
How To Make Kombucha SCOBYs From Store Bought Kombucha
Kombucha first started gaining popularity in the United States back in the 1970s, and people would share their recipes and their SCOBYs freely in communities of home-brew enthusiasts and health-food proponents. Even when kombucha became a commercial product, the brew was pretty close to what you could make in your kitchen, though generally with a more consistent quality and a wider range of flavors. Over the years, as society got busier and “convenience” became a more important word than “community” it started to get harder to find other people who were brewing at home, and many people started buying their kombucha rather than trying to brew it themselves. However, in the last decade or two there’s been a resurgence of the “back to nature” movement and more and more people are learning how to make things like cheese, fermented vegetables, whole-grain bread, and kombucha in their own kitchens. That means it’s getting easier to find sources for fresh, organic kombucha in cities and towns across the country.
Of course, it’s also easier than ever to find bottled kombucha in the store. Even major soft drink corporations are producing commercial kombucha these days, and the number of small commercial brewers is growing steadily. If you want to get the health benefits of kombucha by drinking a bottle a day, you probably won’t have a problem finding a source of tasty kombucha in your local supermarket or health food store.
This daily dose of kombucha might not benefit your budget, though. Most store brands sell for at least $3 per bottle. At one bottle a day, that’s over $1,000 per year, which is more than many people can afford. The solution? Start brewing your own kombucha at home. It’s easy to brew kombucha on a budget and you only need a few pieces of essential equipment for making kombucha. All you need are three inexpensive ingredients, plus a bottle of store-bought kombucha – and that’s the last bottle you’ll ever have to buy.
NOTE: You can also start brewing kombucha by using a SCOBY that you purchase online, or you can go to a brewing supply shop to find a source for SCOBYs in your area.
Which Brand to Use

In general, you should be able to use your favorite brand of bottled kombucha to grow your first SCOBY (the Symbiotic Colony Of Bacteria and Yeast that does the work of fermentation). However, you need to keep in mind that there are some things that make some types of store-bought kombucha better for growing a SCOBY than others.
Unpasteurized. You need to use raw or unpasteurized kombucha. Pasteurization is the process of heating a liquid to a high temperature in order to kill off bacteria. Unfortunately – as you probably realized, since “bacteria” is part of the SCOBY’s name – when you pasteurize kombucha, you kill off or seriously harm the microorganisms that live in the kombucha. This pasteurization doesn’t completely eliminate the nutrients, vitamins, and probiotics that are the natural byproduct of the fermentation process that the microorganisms perform, so even pasteurized kombucha is a healthy drink. But it’s not something you can use to grow a SCOBY. Most large commercial producers pasteurize their kombucha to comply with a 2010 rule established by the Food and Drug Administration.
If you get your hands on pasteurized Kombucha, you can’t use this to grow your own SCOBY.
Unflavored. The natural flavor of kombucha is a little sweet and a little tart, rather like apple cider vinegar or hard apple cider. Many commercial bottlers sell flavored kombucha, and once you start making kombucha at home you can add flavors to your brew, as much and as often as you like. However, you need to avoid flavored kombucha when you’re using it to grow a SCOBY. The added ingredients will interfere with the way the yeasts and bacteria process the sugar they use to grow into a colony. In fact, some ingredients have the potential to kill off the SCOBY (raw honey is an example).
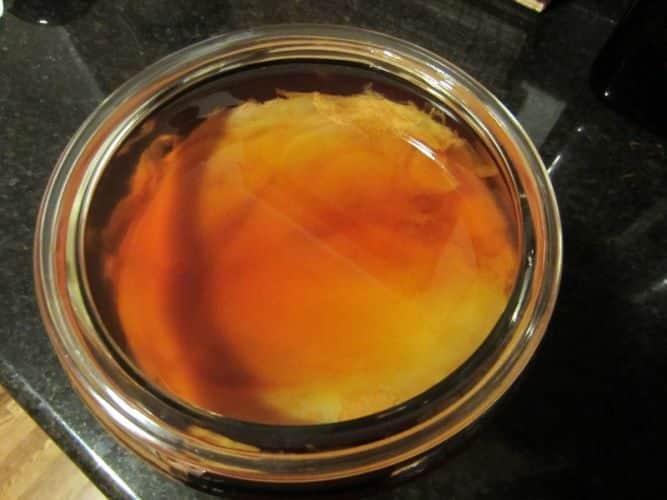
Unfiltered. If you’ve ever looked at a jar of fermenting kombucha, you’ve probably noticed that there are brownish strands hanging from the SCOBY or settling on the bottom of the jar. You’ll see these same strands and particles in a bottle of unfiltered kombucha, and that’s a good sign. These are proto-colonies of yeasts and bacteria, and when they’re already in the kombucha you’re using to grow your SCOBY, they’ll often kick-start the process and your SCOBY will grow more quickly.
You’re more likely to find unpasteurized kombucha sold in health food stores or natural foods markets. You may also be able to find local sources for bottled kombucha at farmer’s markets, where smaller or start-up producers are selling their kombucha in person. If your only option is the supermarket, here are some labels to look for:
- GT’s Organic Kombucha (Original)
- Katalyst Kombucha (Pure Essence)
- Health-Ade Kombucha (The Original)
- BAO Fresh Kombucha (Original)
The Zero-Step SCOBY (easiest)
Some brands of Kombucha (raw, organic and unpasteurized) come with a miniature SCOBY at the bottom of the drink. If you get your hands on one of these drinks, simply take the Kombucha + SCOBY and mix it in with sweet tea. Your SCOBY will grow and you’ll end up with a nice sized one in a couple of weeks. It may take a couple of batches before the SCOBY is full strength, however.
If your store-bought Kombucha does NOT have a SCOBY at the bottom, then you’ll have to read our other guides below: The One Step SCOBY method or the Two Step SCOBY method.
The One-Step SCOBY
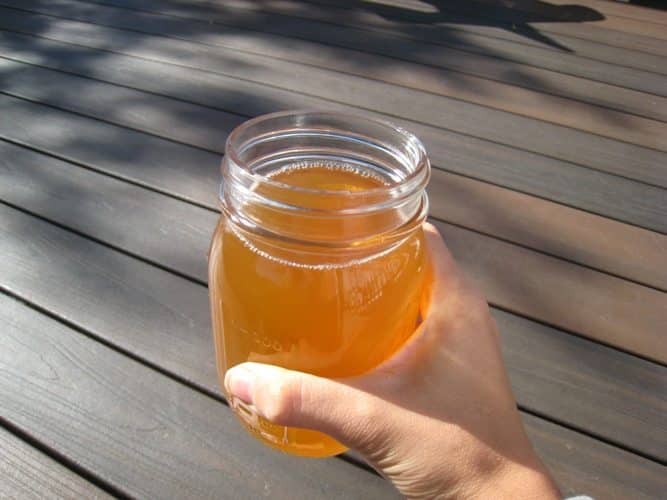
When you have a bottle of raw unfiltered kombucha, you’ve got everything you need to grow a new SCOBY. All you need to do is pour the kombucha into a covered container and wait for the SCOBY to develop.
Note, you can also grow your own SCOBY from Kombucha given to you by a friend — as long as, like the store-bought version, it’s raw, unpasteurized kombucha.
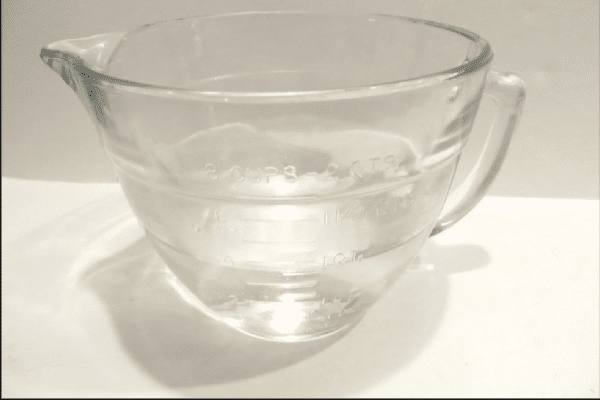
The container. Choose a container made out of glass. Glass doesn’t react with the acids produced by the developing SCOBY, and it’s easy to find containers that are free or inexpensive. Think old canning jars (quart sized), kitchen mixing bowls, even goldfish bowls! As long as the glass is molded in one piece and doesn’t have any chips or cracks, it’s safe to use. Make sure the container is clean, rinsed free of any soap scum, and completely dry.
The cover. The SCOBY is a group of living organisms that need to breathe. However, you also need to protect the colony from invading bacteria and mold, from dust and dirt, and from insects. This means you need to use a cover that allows enough airflow to keep the SCOBY happy, without leaving holes that are large enough for dust and tiny bugs to get through. You can use a clean t-shirt (the plain white men’s undershirts are ideal for this), a clean linen or cotton dishtowel, a clean cotton handkerchief, or any other material that has a fine weave. You can use cheesecloth or muslin that’s designed for culinary use as a strainer, but don’t use the thin wide-meshed cheesecloth that’s sold for use in cooking (to make a herb bundle for a stockpot, for example). Secure the material around the rim of the container by tying it on with string or kitchen twine, or use a rubber band or other elastic. Don’t leave any wrinkles or gaps where bugs or mold can get in.
The location. It will take some time for your SCOBY to fully develop, and during this time you need to leave the container alone. That means it has to be out of the way, and not in a place where you’ll be tempted (or required) to pick it up and move it around. The container and the developing SCOBY also need to be kept at a constant temperature of between 65-80F if possible. The temperature can go as low as 60F or as high as 85F without serious harm to the colony, but a steady temperature of about 72F is ideal. Some people put the container on top of the refrigerator, where it’s out of the way and in a warm location. If you have electronic devices like computers that are always on, they’re probably generating heat as well. You can tuck the container next to the computer tower under your desk, where it will be out of the way, out of the light, and keeping warm. Keep the container out of direct sunlight.
The time. When you’re growing a SCOBY using store-bought kombucha, it will probably take a week to ten days before you start to see the new colony forming on the top of the liquid in the container. However, it may take even longer. You should plan on allowing at least a month before your SCOBY is stable enough to remove from the liquid. A SCOBY that is 1/8 to 1/4 inch thick is ready to use for brewing kombucha tea.
While this is the simplest way to grow a SCOBY using bottled kombucha, there is one thing that you can do to make the process more foolproof and also quicker: give the SCOBY some extra food.
The Two-Step SCOBY
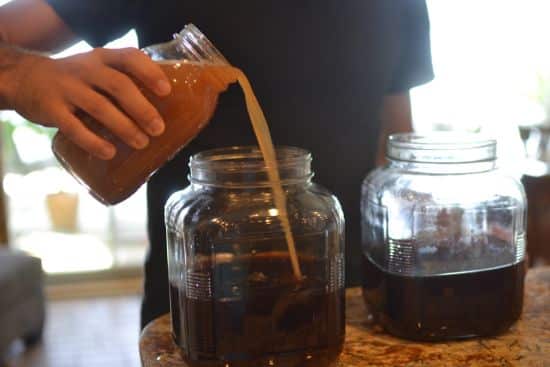
In this method, you’ll do everything exactly as described above in the one-step process, but you’ll also add some sweetened tea to the purchased kombucha. When commercial kombucha is bottled, the SCOBY that was used to make that batch of kombucha has already consumed most of the sugar in the liquid, so there’s not much left for it to eat, and the new SCOBY will grow and develop more slowly. To speed up the development of your SCOBY, you simply need to give it a little more food. And the food that a SCOBY like best is sweet brewed tea.
Step 1: Make the tea.
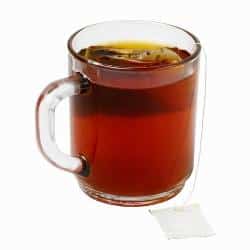
You can use tea bags or loose-leaf tea, but get the freshest tea possible (in other words, don’t use the box that’s been collecting dust in your pantry for years). You can choose any type of black or green tea, but you’ll get the best results from pure black tea, unflavored green tea, or plain oolong tea. To make one quart of sweet tea, you’ll need two tea bags (or two teaspoons loose-leaf tea).
Boil 4 cups of water and pour it over the tea in a heatproof container made out of glass or stainless steel, and let the tea steep for 15 minutes. Remove the tea bags, or pour the liquid through a strainer into another clean glass container. If you’ve brewed your tea in a stainless steel pot, you’ll need to pour it into a clean glass container now as well.
Using a clean wooden or plastic spoon, stir in 1/2 cup raw organic white cane sugar until dissolved. You can use other types of sugar for kombucha, but when you’re growing a SCOBY stick to the white cane sugar for the best results.
Let the tea cool until it’s at room temperature (about 75F).
Step 2: Add the bottled kombucha.

Once your tea is in the glass container and has cooled, pour in the kombucha from the bottle. Make sure that you get all of the yeasty bits at the bottom of the bottle. You might even see a tiny SCOBY already floating around in the bottle, which means your own healthy SCOBY isn’t far away!
Follow the instructions above for covering and storing the container while the SCOBY is developing. When you’ve given your colony the extra food it wants, you’ll find that the new SCOBY will grow more quickly, and it will be thicker and healthier.
What If There’s No SCOBY?
If you’ve followed these instructions and you still don’t see any sign of a SCOBY after four weeks, then you might have to dump out the liquid and start over. Here are some things to look for:
Is it kombucha anyway?
First, examine the liquid for any sign of mold or contaminants. If you don’t see any mold, smell the liquid. If it has the typical sweet-sour odor of good kombucha tea, taste it. If it tastes fine, then you can try using it as the starter liquid for another batch instead of the store-bought brand. Sometimes the SCOBY doesn’t develop until the second batch, after the number of active yeasts and bacteria has grown enough to form a true colony.
Is it obviously contaminated?
If you do see mold, or the liquid looks “off” or tastes or smells funny, throw it away and start over with another bottle.
Was the kombucha old or pasteurized?
Because kombucha is made up of living organisms, old kombucha might not give you enough living microorganisms to form a new SCOBY. Check the label on the bottle to make sure that you’ve got a fresh brew of kombucha. Double check to make sure that you haven’t picked up a bottle of pasteurized kombucha. Triple check the ingredient list to make sure that there’s nothing in the bottle except water, tea, sugar, and kombucha (which might be listed as “probiotic compounds” or something similar).