How To Make Kombucha
This is the complete beginners guide to Making Kombucha — the most comprehensive article on the topic you’ll find. Grab a cup of coffee, sit back and enjoy — by the end of it, you’ll know exactly how to start brewing your own Kombucha and have every question about the process answered.
Introducing Kombucha, The Drink That Maybe Does Everything OR Nothing
You’ve heard about it in the news, you’ve seen ads for it in your Facebook feed, and you’ve walked by supermarket or health-food store shelves that are lined with row upon row of bottles of it – and now you’ve decided you want to make it for yourself.
What is is? The short of it is that Kombucha is a lot of things to everyone it’s that magical, mysterious mushroom tea that movie and music stars like Madonna, Halle Berry, Gwyneth Paltrow, and Meg Ryan have been drinking (and talking about) for years.
When you get right down to it, though, it’s not really that mysterious. And it’s not a mushroom, either.
For many people, Kombucha almost has a magical aura too it; you’ll see a lot of claims that Kombucha heals cancer, restores hair loss, and cures all manner of sickness. And for others, it’s simply an easy and tasty way to get some awesome probiotics into your system.
The truth, like most things in life, lies somewhere in the middle.
What is Kombucha?
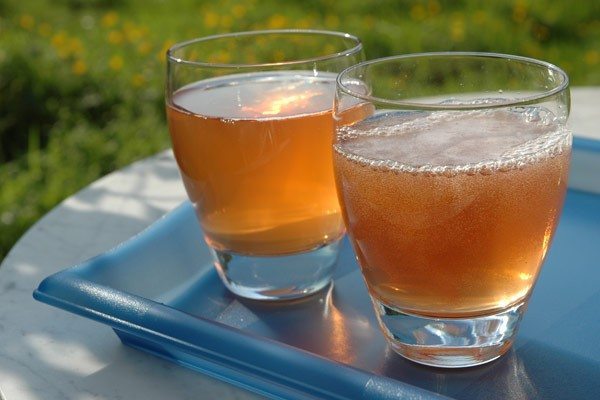
Kombucha as most people know it is sweet black tea that has been fermented by a specific group of yeasts and bacteria, which are also called “kombucha.” In its simplest form, raw unflavored kombucha is slightly fizzy, very slightly sweet, and slightly tangy. These days, you can get bottled kombucha in a wide range of flavors, from fruity to spicy, and there are even places where you can get kombucha on tap.
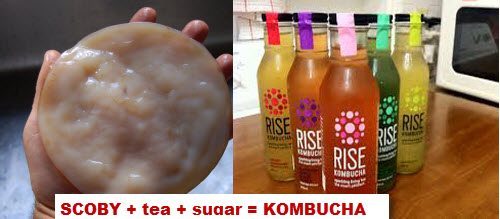
Although people use the word “tea” to mean anything from an infusion of fresh mint leaves to the strongest English Breakfast blend laced with cream and sugar, when it comes to kombucha, “tea” means only two things. First, it refers to the drinkable form of kombucha: kombucha tea, which you might hear called “KT” or “booch.” Second, it means the specific plant, Camellia sinensis, that produces the leaves that make up black tea, green tea, and other variations like aged oolong tea. Although it’s possible to make kombucha tea with other liquids, you’ll get the best results with black tea, especially when you’re just starting out. Another term that’s specific to kombucha is SCOBY: Symbiotic Community Of Bacteria (and) Yeast.
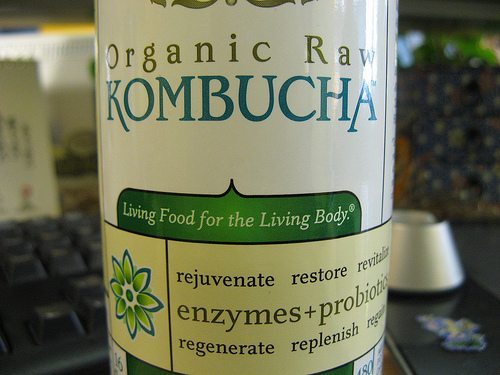
While you generally won’t see a SCOBY in the bottle of kombucha tea you buy at a regular store, you’ll definitely see them if you visit a kombucha brewery. Some Kombucha products (especially if it’s organic raw, unpasturized Kombucha from a health food store) will have a scoby in the drink.
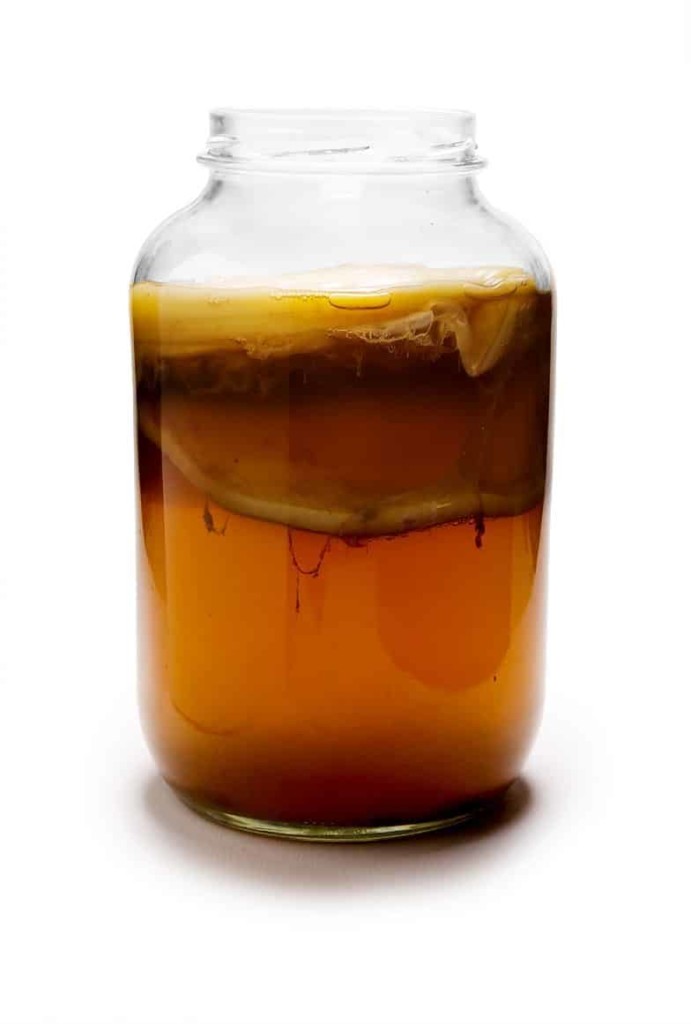
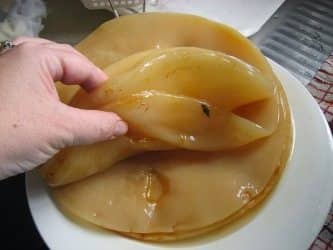
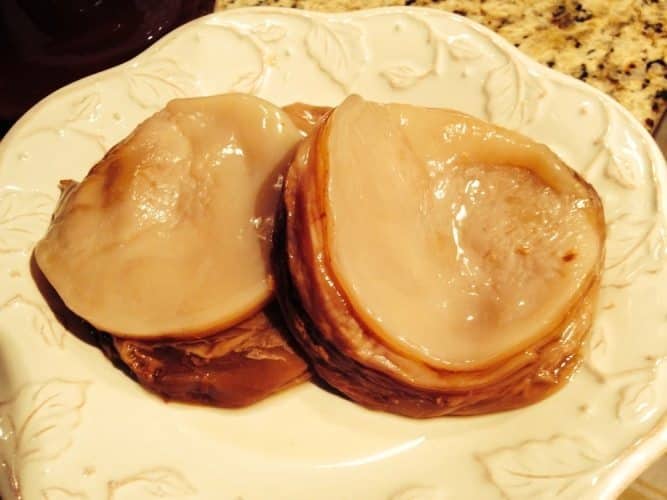
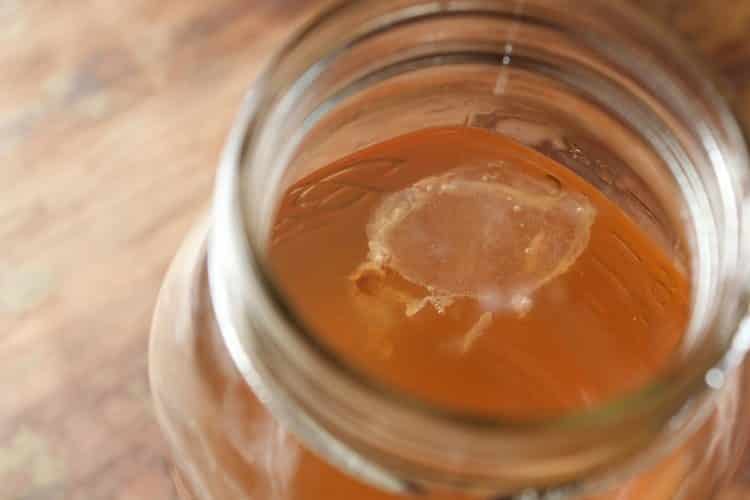
The SCOBY is the “kombucha” and the SCOBY is also the culture that makes the kombucha tea, as the yeasts and bacteria transform the sugar and nutrients in the sweet black tea into lactic acid. Because the SCOBY floats on top of the liquid as it works, and looks sort of like a large flat spongy mushroom, many people think it’s a mushroom.
In fact, some of the traditional names for the SCOBY culture use the word mushroom. For example, the word in Russian is čajnyj grib (tea mushroom), in Mandarin Chinese it’s hongchaju (red tea mushroom), and in Japanese it’s kocha kinoko (black tea mushroom). Despite the recent hype about Kombucha, it’s actually a very old drink, consumed for thousands of years by the Chinese.
The modern name of “kombucha” is generally thought to be a Westernized version of a Korean version of either the Chinese or Japanese term for the culture.
You can learn more about the history of kombucha.
Why Should I Drink Kombucha?
People have been drinking kombucha for over two thousand years. In some parts of Russia, the exceptionally long life of the local residents is attributed in part to regular kombucha consumption. People in Korea used to keep a jar of it for medicinal purposes, and in China it has long been used to balance the chi (qi). Over the years, people have claimed that kombucha cures everything from cancer to the common cold, but scientists have only recently begun to perform controlled tests on kombucha use and its effects on things like parasites, inflammation, and disorders such as Crohn’s Disease. With so much verified and anecdotal evidence to sort through, you might wonder what the real health benefits of kombucha are, and if you’re curious, here is our article on What Are The (Real) Health Benefits Of Kombucha?
What is undisputed, however, is the fact that kombucha contains probiotics, which have been proven to help with digestion, circulation, and general health. Properly made kombucha contains a variety of good-for-you bacteria and yeasts, ones that thrive in a healthy body, and that work to create a healthy body to thrive in. The best way to find out what drinking kombucha will do for you is to start drinking it!
If you’ve never had kombucha before, start out slowly. It is something that will affect your digestion, and because it is a detoxifying agent as well as a mild diuretic, you will need to drink a lot of water, especially at first, as your body adjusts. Many people start out by drinking a few ounces first thing in the morning, along with one or two full glasses of water.
Although the SCOBY eats up a lot of sugar from the sweet black tea, there is still some sugar in the kombucha, as well as trace amounts of alcohol. If you have any concerns about whether or not you should start drinking kombucha, you should consult your doctor.
Step 1: Choose the Kombucha Brewing Equipment
Brewing Kombucha is easy — you don’t need anything fancy and just a handful of basic, every-day ingredients.
Basic Kombucha Brewing Equipment
If words like “fermentation” and “culture” make you think of complicated lab equipment that will take up a lot of room in your kitchen (and take a lot of money out of your pocket), don’t worry. Kombucha is easy to make with just a few pieces of equipment that you can buy anywhere, even at second-hand stores. Here’s what you’ll need:
1. Brewing and storage jars
Most people recommend using glass containers because they’re easy to find, easy to clean, and don’t react to acids. The fermenting kombucha is acidic, and will create pits in metal containers, and can also pull lead out of older glazed ceramic or stoneware pots. Start out by using glass jars, and then experiment with other containers once you’ve got the brewing process down. You’ll find information on other types of jars in this article. How large the containers are depends on how much kombucha you want to brew, but it’s best to start out with quart-sized, half-gallon, or gallon jars.
Brewing Container Recommendations:
The Anchor 2.5 Gallon Glass Jar is a basic 2.5 gallon jar and good enough to brew Kombucha with just fine. I recommend it because it’s 2.5 Gallons which is enough size to keep you in business for 1-2 weeks while your next batch brews. And for $19 USD, you can’t complain about the price. This is enough to brew up 2 gallons per batch, which is roughly 2 cups of Kombucha day till the next batch is done in 2 weeks.
Anchor Hocking 2 gal. Heritage Hill Jar with Spigot
The Anchor 2 gallon Heritage Jar is a bit fancier an option with a spigot. This means you can drain your Kombucha easily without having to pour it out. Between the two jars, I would recommend this jar as it makes withdrawing your finished brew a lot easier, not having to pour it out. Make sure to replace the plastic spigot with This stainless steel one. You don’t want a plastic spigot when doing the ferment as the chemicals can leech into the brew.
2. A clean plate and/or bowl
You’ll need a shallow bowl to store your SCOBY
when you’re not using it, unless you store it in a jar. You’ll also find it helpful to have a plate or bowl to use when you’re transferring the SCOBY in and out of the storage jars.
3. Several wooden or plastic spoons and ladles
You can’t use metal ladles or spoons when you’re mixing up the sweet black tea to feed your SCOBY, so get a supply of wooden spoons. If you can’t find a wooden ladle, you can use a plastic one, as long as it’s heat-resistant.
Recommendations for Spoons
Plastic Spoons set
This is a no frills set of plastic spoons that will work. It’s a set of 3 heat-safe mixing spoons. Basic, cheap, and it will work just fine.
4. Glass / Plastic Measuring Cups
Kombucha brewing isn’t an exact science, but when you’re starting out, you should follow the recipes closely. Once you have more experience, you can adjust amounts.
Recommended Measuring Cups for Kombucha Making
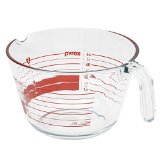
I personally recommend the 8 cup Pyrex measuring cup. And there’s a reason why this is better than you generic measuring cup you might have in your cupboard or one that you can buy at your local Safeway. The 8 Cup Pyrex is the best measuring cup for Kombucha making because it’s GLASS and it’s 8 cups (not 1 or 2 cups like most measuring cups). This means you can transfer half a gallon of the finished kombucha from brewing container to the final container/bottle sooner than later. 8 cups at once saves you a lot of time and you won’t spill the brew everywhere which may happen if you try pouring the finished brew directly out of the brewing container.
5. Pot to boil water
This could be a large stainless steel pot, or a tea kettle (electric or otherwise). Which you use will depend on how you choose to brew your tea. Avoid using anything made of aluminum.
Recommended Pot for Boiling Water / Sweet Tea Making / Kombucha Brewing
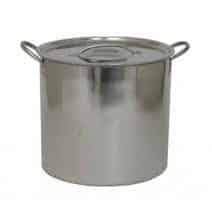
My recommendation for a big pot to make your sweet tea (you can also use it as the Kombucha brewing vessel too) is this 5 gallon stainless steel pot. It’s 32 bucks on Amazon and you can use it to make 2 to 5 gallons of sweet tea in one go.
As a bonus, since this is stainless steel, you can also use it to actually BREW your kombucha instead of a glass jar in a pinch. Keep in mind though there opening will be very wide and you’ll have to cover it with towels. I recommend using proper glass jars to brew your Kombucha, but if you have nothing else, you can use this container as the brewing container.
6. Cloth or Cheesecloth to Cover Kombucha Container
These need to be big enough to cover the tops of the brewing and storage jars completely. The cloth needs to be fine enough for a good oxygen exchange, but thick enough to keep out bugs and dust. You could use a handkerchief, a piece of a (clean) men’s undershirt, or a napkin.
Breathable Lid Cover Recommendations
I recommend just using Cheese Cloth. Just cut off a piece, double fold it over and put it over the top of your Jar/Container with a rubber band to hold it on the top:
Chef Premium FOOD GRADE 60* Fine Mesh Unbleached 100% Cotton
This is basic cheesecloth but works well enough for a lid cover if you double fold it over and use a rubber band to clamp it to the top of the jar.
7. Rubber bands or other elastic bands
You need to make sure that there are no openings for bugs to get into your brewing and storage jars, so use elastic bands to secure a cloth to the top of each jar.
8. Plastic / Glass/ Wooden straws
This is for tasting your kombucha as it brews. You can use anything really (even a stainless steel spoon), but it’s easier if you have a straw.
Recommended Straws
Tropical Bamboo Reusable Drinking Straws, Set of 12
These are useful to taste your Kombucha as they are so long and being Bamboo are natural and won’t interact with the Kombucha. Just dip it in and take a sip and you’ll know right away how your Kombucha brew is.
8. Clean glass bottles for your Finished First Ferment Kombucha or Second Ferment
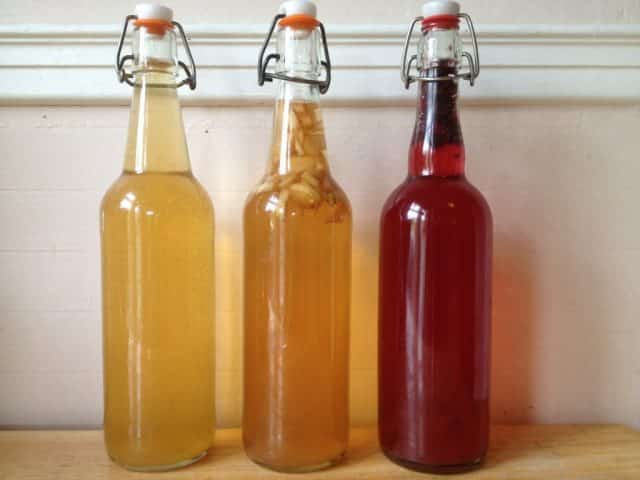
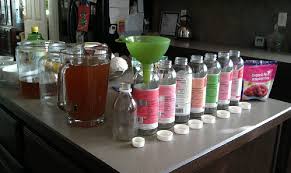
If you’re just pouring off the fresh brew to drink, you can use regular bottles with screw-top lids. If you are going to keep fermenting your finished kombucha, you’ll need to use bottles that are designed to handle carbonation, and the corks or flip-top seals for the bottles.
Recommended Bottles
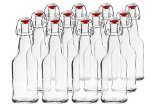
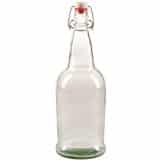
CASE OF 12 – 16 oz. EZ Cap Bottles
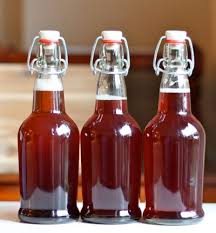
I recommend these EZ Cap bottles for your secondary ferment container. You get a better tasting secondary ferment brew with more fizz.
There are other optional pieces of equipment you might decide to buy later, to make the brewing and production process quicker or easier to control, and you can read more about them in this article.
So that’s all you need to get started! Except a SCOBY, of course.
All About SCOBYs
Where to Get Your SCOBY
In order to make kombucha, you need a SCOBY. In order to get a SCOBY, you need kombucha … how to solve this dilemma? By purchasing a SCOBY from someone who’s already making kombucha. Kombucha is so popular these days that it’s not hard to find a good source for your SCOBY, but if you’re not sure where to start looking, read this article.
It’s better to buy your first SCOBY. It’s a good idea to start with a purchased SCOBY, because that way you know you’re getting started with a healthy culture that will give you the best results. If you know someone who is already making kombucha, you can ask them for a SCOBY, because they probably have more than a few to share with you. One of the great things about making kombucha is that each time you make a batch, you get a new SCOBY, so someone who makes a lot of kombucha usually has a lot of extra SCOBYs sitting around.
But you can grow your own. You can also grow your own SCOBY using store-bought kombucha using the techniques described in this article. However, since these cultures are sometimes thinner and weaker than ones that are made using the standard fermentation process, it is usually recommended to make your first batch with a culture from a reliable source. After all, it’s really just a one-time purchase, because as soon as you start brewing, you’ll be starting your own ever-growing supply of fresh SCOBYs to use and to share.
When you get your SCOBY, whether that’s in the mail or from a friend, you’ll need to make sure it feels at home right away. For a SCOBY, “at home” means “covered in kombucha or sweet tea.” When you buy a SCOBY from a retailer, they’ll send it to you with enough liquid to keep it wet. This liquid is the starter you’ll need to boost your first batch of kombucha, so whatever you do, don’t drain it and throw it away! If you get your SCOBY from a friend, they’ll probably also pour a cup or two of starter over the culture before they give it to you, but if they don’t, be sure to ask – and be sure to have a back-up plan, because someone who doesn’t know that SCOBYs and starters go together might not be making the best kombucha.
Storing Your SCOBY
The SCOBY is a living organism like you, and like you it needs food and oxygen to thrive. It gets both of these when you use it to make kombucha, so the sooner you use your new SCOBY the better. However, unlike you, a SCOBY can go into a dormant state as long as it’s healthy and you provide it with a nutrient-rich environment and cooler temperatures. That means you can store your SCOBY for a few days before using it, if you really need to. The sooner you use it, the healthier it will be.
After you get your SCOBY home you should put it into a clean glass bowl that is the right size to keep the culture just covered with the starter liquid. If you have ordered your SCOBY through the mail, you should open the plastic package(s) of culture and starter, and pour them in the bowl. Cover the top of the bowl with a clean cloth and secure it with a rubber band or elastic. Put the bowl in a cool place until you are ready to make your first batch of kombucha.
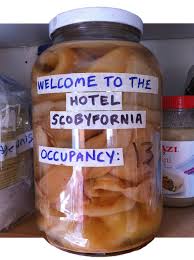
To store your SCOBY between batches you can create what most brewers call a “SCOBY hotel.” This is nothing more than a large jar where you keep your SCOBY (or SCOBYs) with a good supply of kombucha, feeding them regularly with fresh sweet black tea so that they have enough food to survive. If you’re using your SCOBY right away to make a new batch, you won’t need this storage jar until you have more SCOBYs than brewing jars. Remember, each new batch creates a new SCOBY or two (or three or four), so you’ll need one soon.
To put your SCOBY into a dormant phase you can store it in its jar, covered in kombucha, in the refrigerator. However, this may sometimes damage the SCOBY if it gets too cold. If you need to take a long break between batches but still want to keep your SCOBY alive, read the directions in this article.
To keep your SCOBY active store the jar at slightly cooler than room temperature (65-70F), preferably in a dim or dark location, and feed it regularly. The SCOBY will continue to grow whether you use it to brew kombucha or not. Make sure you keep enough liquid in the jar to keep the SCOBY wet, and that you give it fresh sweet black tea every week or two.
Step 3: Choose the Basic Kombucha Ingredients
Now that have your Kombucha brewing equipment and your SCOBY, you are almost set to go.
Almost.
You need the other four ingredients for making kombucha: water, sugar, tea, and kombucha starter. For your first batch of kombucha, you’ll probably do best with the most reliable versions of each of these three basic ingredients. Once you know how your brewing works, you can try other combinations.
Water
For the best results, use filtered water, distilled water, or store-bought spring water (if you get your water from a spring, you should still filter it). You need water that has little or no chlorine in it, because chlorine will negatively affect the SCOBY and the fermentation. If you live somewhere with a city water supply that is heavily chlorinated, you can boil the water for 10-20 minutes, or put it in a large shallow container covered with a cloth and let it sit at room temperature for 24 hours. For more information on getting the best water for your brew, and on brewing with other liquids, read this article.
Sugar
Studies have shown that the SCOBY culture likes sugar that’s easy to digest, and that means sucrose – and that means regular refined white cane sugar. Beet sugar is also sucrose, but is more highly processed. If you want the healthiest possible brew, use organic white cane sugar. You can experiment with other types of sugars once you have a good supply of SCOBYs in your hotel. Not all types of sugars will work in the same way, and you might not like the results. Once you’ve learned what this basic kombucha tastes like, you can play around with the ingredients. For some ideas about using other types of sweeteners, read this article.
Tea
Once again, stick to the basics. You want to get the standard black tea, with caffeine, that you’ll find at any supermarket. Get the best brand that you can, so that you have the freshest product with the highest percentage of whole tea leaves. Loose-leaf tea and tea bags work equally well. Avoid teas that are “flavored” because they will have chemicals and oils that will have a negative impact on the brew and the SCOBY. Once you’ve got your basic brew going, you can try out different blends and teas, which will give you different flavors in your final kombucha. Read more about tea options here.
Starter
Your purchased SCOBY should come with at least half a cup of starter (the liquid it’s packaged in). For the basic kombucha recipe below, you’ll need two cups of starter, so you’ll also need to go to the store and buy a bottle of raw, unfiltered, unflavored kombucha (organic if possible). Don’t worry – this will be the last bottle you’ll have to buy! If you can’t find bottled raw kombucha, you can substitute distilled white vinegar.
You’ve assembled your SCOBY and starter, your water, the sugar, and the tea. Now it’s time to brew some kombucha!
Step 3: Brewing the Kombucha
Step 1: Make the Sweet Nutrient Tea
We’ve created a video on our YouTube channel to show you how to make the Sweet Tea.
Written Guide to Making Sweet Tea
For your first batch, use the standard measurements in this basic recipe. Once you know how your SCOBY will develop and what it likes, you can adjust the recipe to make your SCOBY happy and to get the strength and flavor of kombucha tea you prefer. Brewing conditions will be different for every kombucha brewer, and sometimes even for every different brewing session. Changes in the weather, the way the SCOBY develops, and the type of sugar and tea will all affect the brew. When you’ve done a few batches, you’ll get a sense of what to expect.
This general recipe makes one gallon of kombucha tea. You can adjust the ratios for more or less tea. It’s not an exact science here as the temperature of the room you brew your Kombucha, the size and health of your SCOBY, the amount of sugar, the amount of tea, and the desired fermentation level (sweater tea or more sour tea) you have will affect the brewing time.
Things to Remember for brewing:
- The water needs to be distilled, bottle spring water, or filtered.
- The pot you use needs to be made of stainless steel, not aluminum or other metal.
- The sugar should be refined organic white cane sugar.
- The tea should be good-quality black tea with caffeine but without flavorings.
- Only use food-grade plastic, glass, or wooden utensils to measure and stir.
Basic Kombucha Sweet Tea Recipe
- Bring 1 gallon of water to a boil, then remove it from the heat.
- Stir in 1 cup of sugar until dissolved.
- Add 8 bags of black tea (or 8 teaspoons of black loose-leaf tea tied in cheesecloth).
- Let the tea steep until the liquid is at room temperature (approximately 70-75F).
- Remove the tea bags or bundle of loose tea leaves.
- Pour the cooled sweet tea mixture into your clean one-gallon fermenting jar.
NOTE: This recipe makes 1 gallon of sweet tea, but you’re going to be adding more liquid (the starter) plus the SCOBY, and it won’t all fit into a one-gallon jar. Once you’ve taken the tea bags out of the liquid, remove 2 cups of the sweet tea and set aside. You can drink the tea yourself, of course, but you can also put it in a closed glass container (use a plastic lid, not a metal lid) and store it in the refrigerator. When you have your SCOBY hotel going, use this extra sweet tea to keep the hotel residents fed. You can learn more about SCOBY hotels in this article.
Step 2: Add the Starter
The starter is what gives your brewing kombucha the acid environment it needs to prevent the development of bad bacteria, while the SCOBY is feeding on the sugar in the tea and releasing more acid. Think of this as providing the ideal environment for the SCOBY to do it’s thing — good for the SCOBY organisms and bad for the organisms you don’t want growing at the same time. Once this SCOBY has settled for a few days and starts turning the sugary tea into Kombucha, the environment is not friendly for bad bacteria. But the first couple of days, your kombucha brew is most vulnerable to bad bacteria.
There are three things you can use as this acid kick:
- fermented kombucha from a previous batch
- purchased raw unfiltered kombucha
- distilled white vinegar (5% acidity)
For this recipe and your first batch of kombucha, you will use the starter liquid your SCOBY came in, plus additional purchased raw kombucha to bring the total liquid amount up to two cups. If you absolutely cannot find prepared kombucha anywhere in the stores, use distilled white vinegar instead, but reduce the total amount (read how to substitute white vinegar for Kombucha starter)
Basic Kombucha Starter Recipe
If you haven’t removed 2 cups of liquid from your gallon of sweet tea, do it now.
Drain the liquid from your SCOBY into a glass measuring container and add enough of the purchased kombucha to make a total of 2 cups of starter. Stir this liquid into the room-temperature sweet tea mixture.
If you don’t have any purchased kombucha, stir in all of the liquid from the SCOBY package, then measure out 1/2 cup (8 Tbs) distilled white vinegar and stir that into sweet tea mixture.
Step 3: Add in SCOBY and Cover the Jar
Carefully place the SCOBY into the jar on top of the sweet tea and starter mixture. If your jar is big enough, you may be able to simply slide the SCOBY from its plate or bowl onto the top of the liquid. If you’re going to use your hands, be sure that they’re very clean and free of soap residue. You can rinse your hands in some distilled white vinegar to make sure there is no soap left, before picking up the SCOBY.
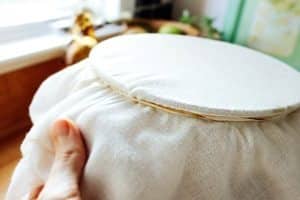
Use a clean cloth to completely cover the top of the jar, and use a large rubber band, an elastic loop, or even some string to tightly pull the cloth around the outside edge of the rim of the jar. You’re going to be leaving this jar out in the open during its fermentation, so you want to be absolutely sure that no bugs, dust, or other contaminants can get inside.
However, the SCOBY needs to breathe, so the cloth needs to be thin enough for a good flow of oxygen. You do NOT seal the jar with a lid or other air-tight object!
Important Storage Tips
Make sure that you put the jar in a place that gets good air circulation. Again, the SCOBY will develop best if it has plenty of oxygen, so putting the jar in a closed cupboard may slow down the fermentation process.
Be sure that the jar is out of direct sunlight. You don’t need to have the jar in total darkness, but keeping it in a place that gets approximately the same amount of dim light all the time will help keep the temperature stable, and prevent your SCOBY from overheating.
However, your SCOBY also needs to stay warm, so make sure the jar is in a warm place. The best temperature for your SCOBY while the kombucha is fermenting is between 68-82F so try for a steady temperature of around 75F. If the temperature is between 60-68F, fermentation will be steady but slower. For tips on how to keep your culture warm enough, read this article.
On the other hand, if the temperature goes over 85F the yeasts will develop too quickly and your SCOBY may be harmed, so make sure the jar is in a place that’s not too warm. This can be an issue in the summer, especially in the south. You’ll find some warm-weather tips on fermenting in this article.
Finally, choose a location for your jar that is out of your way. It’s important that the jar isn’t moved or jostled while the mother SCOBY is “giving birth” to the baby. Find a corner of your kitchen counter that you won’t need, or put the jar on top of the refrigerator.
Step 4: Wait and Taste
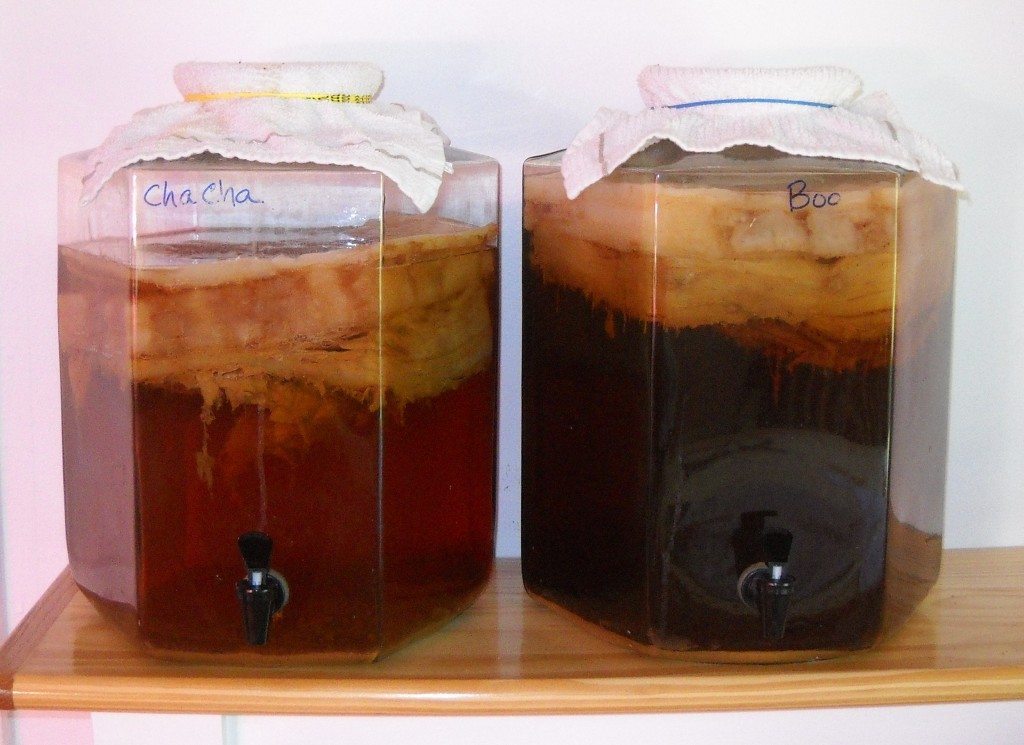
The SCOBY will start to digest the sugars and ferment the brew, but it will take a day or two before you see any results. The first thing you’ll see is the “baby” SCOBY on the top of the liquid. At first, it will look like a clear film, and then you’ll probably see more white spots as the baby SCOBY grows and gets thicker. Be sure to leave the jar and the liquid alone during this time, so that you don’t disturb the baby SCOBY. Your original SCOBY may be floating in the liquid, or it may sink down to the bottom. Don’t worry – it will start floating again. Even if it stays at the bottom, it’s probably still all right. Learn more about what a healthy SCOBY looks like in this article.
When to taste your brew. If you’re keeping your fermentation jar at about 75F, start tasting the brew on the 5th day. By this point, much of the sugar has been converted into acid, giving the brew the kombucha flavor you know and love. Depending on how sweet or tart you like your brew, you’ll want to stop this primary fermentation between the 7th and the 30th day. How fast your kombucha brews depends on the temperature in the room, SCOBY strength, your ratio of tea, sugar, and scoby, the width of your jar opening (wider jar openings = more exposure to air = faster brewing time), so keep in mind the time of your brew is variable.
How to sample your brew. Take a clean plastic straw and slip it carefully under the edge of the SCOBY until it is about halfway into the liquid. Use your thumb to cover the top of the straw, and carefully pull it back out without moving the SCOBY.
How to judge your brew. Taste the brew – is it too sweet? Then you need to let the SCOBY keep working. Is it too tart? Then you’ve let the SCOBY convert too much of the sugar into acid. You probably won’t find that it’s too tart until after the 14th day of fermentation, though in a warm environment this might happen after the 7th day. That’s why you need to taste and judge for yourself, every day.
As a rule of thumb, I find in a very warm environment (I live in Thailand) of about 30 degrees, my Kombucha is ready to go after 7-10 days. After splitting the SCOBY, the kombucha brew is weaker and takes about 14 or 15 days, but short of that, about 10 days gives me a sweet yet tart brew.
NOTE: If you plan on doing a second fermentation, you will need to stop this primary fermentation when the brew is still a little sweet, so that there is enough sugar in the mix for a good second ferment and the development of carbonation (fizzy bubbles). You can learn about secondary fermentation here.
Step 5: Remove the SCOBY
When the flavor of your kombucha is exactly as you like, stop the primary fermentation by removing the mother SCOBY and the baby SCOBY (note, it sometimes takes several brews before the baby SCOBY develops).
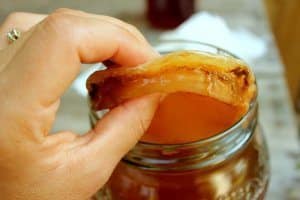
With clean hands, take the SCOBY/s out of the jar. If they’re stuck together, you can usually peel them apart easily. If you’re having problems separating them, read this article.
You now have two options:
Store your SCOBY for later. If you don’t want to start a new batch of kombucha right away, put the SCOBYs in a clean glass jar, and pour in enough of the freshly-brewed kombucha to cover them (use at least 2 cups). Put a clean cloth over the jar, secure it with a rubber band or elastic, and put the jar in a dark or dim location, at room temperature or slightly cooler.
Start a new batch of brew. You can also use one or both SCOBYs to start a new batch of kombucha. For each batch, set aside one SCOBY in a clean glass bowl or shallow plate, and cover it with 2 cups of your brewed kombucha, which will be your starter for the next batch.
NOTE: Depending on how thick your baby SCOBY is, you might want to wait before separating it from the mother. You’ll get the best results from a SCOBY that’s about a quarter of an inch thick.
At this point (after removing the SCOBY from the mix and adding it + 1 cup of starter into another jar with sweat tea) you can simply put your Kombucha brew into the fridge and drink it.
But if you want to add more flavors, more fizz, and more carbonation, you can do a secondary fermentation. Go to Step 7.
If you don’t want to do a second ferment, but want your kombucha to have a bit more fizz, go to step 6 and stop there.
Step 6: Refrigerate Kombucha After First Ferment
If you don’t want to do a secondary ferment / add more flavors, you can end the process here. With the SCOBY removed in Step 5, your leftover kombucha is what you are going to drink. You put it in the fridge and enjoy it.
You may see pieces of SCOBY in the mix. This is perfectly fine. You can drink them with the brew, or if you want, pour your kombucha through a PLASTIC strainer, cloth, or cheese cloth to filter out the SCOBY pieces.
Before you put your brew in your fridge, you have three options:
- Add flavoring to your finished kombucha brew (juice, fruit, syrup, etc)then refrigerate — see earlier section ‘Adding Flavor After Brewing’
- Bottle your Kombucha then refrigerate
- Doing a second ferment for 2-14 days (see last section of this guide)
Options 1: Add Secondary Flavor to your finished Kombucha (optional)
You can add in flavor to your finished kombucha. Add in fruit juice, sparking water, water kefir, syrup, spices, or herbs — any flavor you feel like. This is the easiest way to flavor your Kombucha and it does not require any additional fermentation time. However, we do suggest you do a second ferment for better, deeper flavors, as we will discuss in the next section.
Option 2: Bottle Your (Plain) Kombucha Tea (optional)
This is an optional step here. You can end things at Step 6 — take your SCOBY + 1 cup of kombucha out of your Kombucha, put it into another batch of tea and start brewing your next batch. Take your remaining Kombucha without the SCOBY and put it in the fridge and enjoy.
However, you can also optionally put your kombucha into small bottles before putting them in your fridge. This will add more carbonation to the brew over time while they are refrigerated.
You can use any clean bottles for your finished tea, whether they’re glass or plastic (we recommend glass however as it does not chemically interact with the brewing nor does it have the risk of leaking chemicals into the mix like plastic does), if you’re going to drink the kombucha right away.
When filling each bottle, leave an inch or two of space at the top, to allow for carbonation. Put the caps on tightly, and store the bottles in the refrigerator. Drink within two weeks. Because some fermentation continues even in the refrigerator, and this fermentation causes a buildup of carbon dioxide, you should carefully undo the caps every few days to release the excess carbonation.
Many people find that Kombucha tastes it’s very best when bottled, since second fermentation (slowly) occurs from the sealed bottles and little space between the top of the liquid and the bottle cap built up MORE carbonation, giving your kombucha more fizz to it.
Note though, doing a second fermentation BEFORE you bottle your kombucha will increase the fizz / carbonation even more (not to mention you can add secondary flavorings to it if you do a second ferment).
Read our how to bottle kombucha for more detailed information on the process.
What to Do with Extra Scobys
If you end your fermentation here with the first ferment. You may (eventually) end up with extra SCOBYs as they do reproduce with each new batch of Kombucha. You can either your extra SCOBYs and put them into a SCOBY hotel to store them. We recommend you consistently use the new ‘SCOBY babys’ for your main brewing as these are often the freshest and best producing SCOBYs. However, you can certainly reuse older SCOBYs many, many times without issue. You’ll just want to replace them eventually with their newer children.
Option 3: Flavoring Kombucha via Second Fermentation
If you don’t mind waiting a couple days (up to two weeks) for your Kombucha and you really want to infuse a lot more flavor into the mix and add in more carbonation, then you should do a Second Fermentation before you refrigerate.
This is what I recommend — it is what delivers the best tasting Kombucha. I do it every time myself and it’s where you can really experiment with different flavor profiles.
Read the last section of this article for how to do this.
Flavoring Kombucha
You can flavor your kombucha at different times and through a number of ways. This is just some extra information about the process.
Adding Flavor While Brewing the First Fermentation
Another popular way to change the flavor of your kombucha is to change what you do during the initial brewing process. You can use different types of tea (together or in a blend), and see what happens when you use a stronger brew or a lighter brew.
You can experiment with different types of sugars (cane sugar, refined white sugar, etc. You can also adjust the brewing time to get different levels of sweetness and acidity. (Learn more about adjusting brew time in this article).
We call this flavoring the primary fermentation.
Use all three variations in combination, and you’ve got a wide range of flavors to play with.
For example, you might use a mixture of green tea and jasmine tea to make your sweet starter tea (the green tea has caffeine, so your SCOBY will get the nutrients it needs). Because the jasmine tea has a floral note that sometimes gets too harsh with long brewing, you could try a lighter brew, or try brewing the green tea for a longer time, and then mixing it with freshly-made jasmine tea that you’ve only steeped for 5-10 minutes. Instead of using the full quantity of sugar, add half the amount of sugar to the hot steeping tea, and then stir in the other half as honey, when you add the jasmine tea to the cooled green tea. The SCOBY takes longer to break down the sugars in honey, so this increases your total brewing and initial fermentation time. What that means is that you have a wider range of flavor, and more points at which you can choose to stop the fermentation on its way from sweet to acidic.
Learn more about first-brew flavoring options in this article.
Adding Flavor to Finished Kombucha
This is the quickest and easiest way to add a new flavor to your already delicious kombucha.
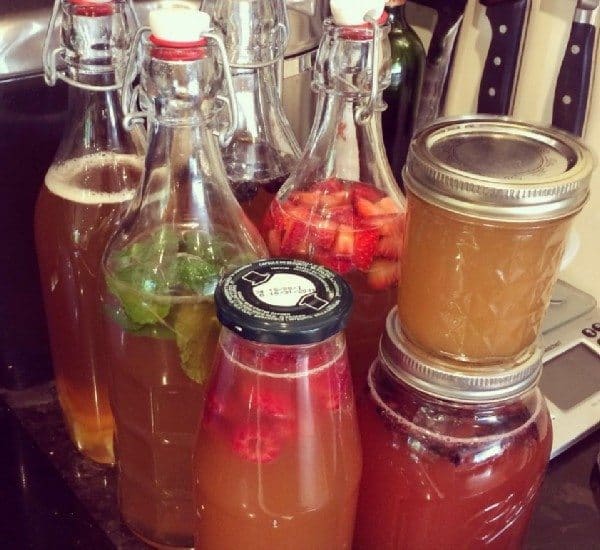
Add a little flavoring syrup to your glass before you pour in the kombucha, or mix the kombucha with fruit juice, or do a blend of kombucha and sparkling water with some herbs (like fresh mint leaves) – basically, add any flavor you like to the already-made kombucha after you pour it into your glass or into a pitcher for serving.
Because you’re adding flavor a glass at a time, this is an easy way to flavor the kombucha you make with a continuous brew system.
Adding Flavor With Secondary Fermentation
For maximum flavor profile AND to build carbonation in your kombucha, you’ll need to do a secondary ferment .
The Final Step: Secondary Fermentation (optional)
Many people enjoy the taste of this plain, tart-sweet, slightly fizzy kombucha, but it’s also fun to add flavors and/or more fizz.
Why a Second Ferment?
Probably the most popular way to add flavor to kombucha is to do a secondary fermentation. In this method, you stop the primary fermentation by removing the SCOBY, then add your flavor (fresh fruit, fruit juice, sweetened herb tea, etc.) before closing up the jar or bottle to let the yeasts and bacteria in the kombucha tea “feed” on the new sugars in the flavoring. Because you’re closing the container, instead of just covering it with a cloth, the carbon dioxide (CO2) produced in this “feeding” process will be trapped in the kombucha tea, making it more carbonated – in other words, more fizzy.
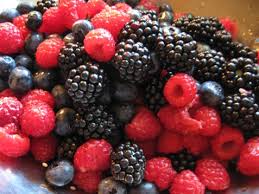
It’s important to note that you do need SOME sugar in the kombucha to pull off a second fermentation. Your Kombucha either needs to be somewhat sweet (it won’t work so well if you’ve left your first fermentation so long that the kombucha is mostly tart and vinegary and not sweet) or you need to add some sugar source — fruit, fruit juice, or more sugar. We recommend fruit juice or sliced fruit as this sugar source as it adds more flavor into the kombucha while also providing fuel for the second fermentation.
Note: Never add fruit or herbs to first ferment. You don’t want to add fruit or fruit juice or anything else but tea and sugar to the first fermentation as fruit sugar is not ideal fuel for the SCOBY and herbs may interfere with the friendly-environment the SCOBY needs.
Why do you need to completely close the container with a lid instead of with a cloth?
- The primary fermentation is an aerobic The SCOBY needs to “breathe” while it “eats” the sugars in the sweetened tea. While eating the sugars, the SCOBY takes in oxygen, and releases carbon dioxide. Some of the carbon dioxide remains dissolved in the kombucha tea, but most is lost.
- The secondary fermentation is an anaerobic process (“anaerobic” means “without oxygen”). You’ve removed the SCOBY, and now the only things that are working are the yeasts and bacteria in the kombucha tea. The yeasts and bacteria continue to process the sugars, but this time, without oxygen, they turn the sugars into CO2 and alcohol.
Check our our dedicated written guide to doing a second ferment of your Kombucha for more info.
Here’s a simple recipe that illustrates how secondary fermentation works.
Blueberry-Mint Mojito Kombucha
Ingredients and Equipment:
- 1 batch basic kombucha tea (1 gallon minus 2 cups)
- 1 pint fresh blueberries, rinsed and dried (or use frozen blueberries)
- 8-10 large fresh mint leaves, washed and dried
- 8-9 tsp freshly-squeezed lime juice
- 4 750-ml glass bottles with flip-top lids
- 1 16-ounce plastic soda or water bottle, with screw cap – OR – 3 glass quart jars with plastic screw-top lids
- 1 10-ounce plastic soda or water bottle, with screw cap
Follow Steps 1 – 4 above to make a batch of basic kombucha tea. Stop the initial fermentation when the brew is still fairly sweet. Remove and store your SCOBY.
Step 1 of Secondary Ferment: Create the flavoring agent
Following our sample blueberry-mint kombucha:
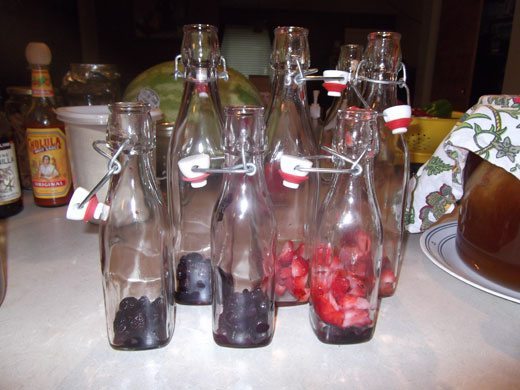
If using fresh blueberries, crush them thoroughly; frozen blueberries will fall apart when they thaw, so you don’t need to crush them. Put about a half teaspoonful of the berries in the plastic soda bottle, then divide the remaining berries evenly between your glass jars or bottles. Tear each mint leaf in half, and add two leaves to each glass bottle (three to each jar) and a half leaf to the plastic bottle. Add two teaspoons fresh lime juice to each glass bottle (three to each jar) and add a dash of lime juice to the plastic bottle.
OR
Make your own flavor agent:
Of course, most of the fun here is to get creative and make your OWN flavor.
It’s easy too! You can mix in fruit (or fruit juice), herbs, and spices to come up with any kombucha flavor you can imagine.
You can substitute almost ANY fruit (avoid grapefruit or fruit that has anti-bacterial properties though which may interfere with the fermentation process) or fruit juice as the sugar base or fruit juice. Fresh fruit I find works the best, but in the winter when it’s cold and you don’t have a ready supply, you can use dried fruit or even frozen fruit even.
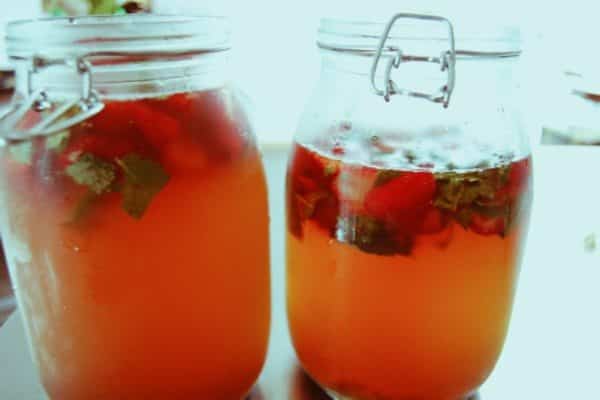
If using fruit, slice a cup or two of fruit and put it into the kombucha jar. Or you can put in fruit juice to Kombucha with a ratio of 10 to 30 percent. Additionally, you can add in herbs and spices.
Some fresh herbs that work well: whole or pressed ginger, fresh chilies, mint, rosemary, lavender, thyme, sage, etc
Spices that work well: cinnamon, vanilla beans, ground cacao beans
Go here for a big list of our 15 best kombucha flavor recipes.
Step 2 of Secondary Ferment: Bottle the Kombucha
After mixing in the flavor agent into the brew, pour the kombucha tea into the glass bottles or jars, filling them up almost to the top – leave only about 1/4 to 1/2 inch of space. If you want to maximize flavor for each bottle of kombucha, ensure each bottle contains an equal portion of the fruit pieces (if using fruit) and herbs (if using herbs).
Pour the remaining kombucha into the plastic bottle.
If you don’t want to use bottles or don’t have them but rather a big glass jar (or the same type of glass jar you used for the first ferment), this will work fine too. The only difference is that your tend to get MORE carbonation if you use airtight small bottles with only 1/4 or less of space between the kombucha and top lid.
If you want to use bottles, we recommend something like the Grolsch Flip-top Bottle recommended below.
Recommended Bottles for Secondary Fermentation
For the best secondary ferment, do yourself a favor and just buy the EZ cap bottles. You get a much stronger fizz and a deeper ferment. You can get by fine with regular jars, but I find they often don’t have as much fizz as if you use a bottle. Additionally, the flavor profile is better after the secondary ferment finishes — perhaps due to the better carbonation and the more surface area the fruit takes up compared to using a big jar.
CASE OF 12 – 32 oz. EZ Cap Beer Bottles – CLEAR
A good size if you want to only have a few bottles to put your ferment into. These are the size of a large wine bottle. You save space and time by using these over the smaller bottles. However, these will be more like a ‘jug’ than a soda pop bottle you can hand hold.
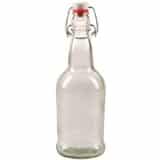
CASE OF 12 – 16 oz. EZ Cap Beer Bottles – CLEAR
This is about the size of a soda pop can. And you get a great fizz. For personal enjoyment when drinking Kombucha, the 16 oz size is the best.
But to cover both ends, buy a case of the 32 oz and a case of the 16 oz and get the best of both worlds. It’s not very expensive.
For even Better Secondary Fermentation…
If you want to really take things to the next level, you can use an Airlock to increase fermentation time, carbonation, and alcohol percentage without worrying about an explosion. You can buy a Fermentation kit for about 15 dollar. This is not really for beginners, but if you get serious about Kombucha, you’ll probably want to buy it and experiment with it. You can basically do very long secondary ferments and really see how the deep flavor profile changes over weeks. Without this kit, you will be restricted to a few days to a week or so of secondary ferment. And because you likely will be burping your bottles, you will be allowing some Oxygen into your kombucha, which changes the fermentation. Using an airlock prevents any O2 from entering and allows excess CO2 to leave. This means you can leave it for weeks to months to secondary ferment.
Is this necessary? No, but it’s damn fun and for $15 dollars, I suggest you just buy it so you can play it it and fully unlock the powers of secondary fermentation. You’ll also need the airlock if you want to increase your alcohol content in your kombucha, making Kombucha Alcohol or Kombucha wine.
1 Gallon Glass Wine Fermenter-INCLUDES Airlock
This is about 15 dollars on amazon and everything you need to do a 1 gallon deep Kombucha Secondary Ferment.
Just remember two things here when doing your second ferment to add more FIZZ and flavor:
- Use an Airtight GLASS jar / bottle — ensures carbonation builds up and does not leak
- Fill the Kombucha until you are about an inch from the top — ensures more carbonation build up
Step 3 of Secondary Ferment: Store the Second Ferment Brew
Securely close all of the bottles (if you are using bottles) and put them out of the way, in a dark or dim place, at room temperature. If you are using a glass jar, the same logic applies: store it away from the sun.
Since you’re now doing anaerobic fermentation, you can use a cupboard or closet for this step. Leave your bottles / jar here between 2 to 14 days, checking them every couple of days. The longer you second ferment, the more carbonation will build up. You will also get a different flavor profile the longer you second ferment — you will have to taste to test.
Step 4 of Secondary Ferment: Monitor the fermentation
The carbonation will start to accumulate inside the bottles / jar as the yeasts convert the remaining sugar in the tea and the sugars in the blueberries.
You need to check every couple days to make sure that the carbonation isn’t building up too much too quickly, or you could have an explosive situation on your hands!
Remember that plastic bottle we poured some kombucha in? Well, here’s why: Squeeze the sides of the plastic bottle – when it feels hard and pressurized, that means there’s a lot of carbonation built up in the bottle. The same carbonation will have built up in the glass bottles.
You can also check the carbonation by opening the bottles, but you’ll lose some carbonation this way. However, if the CO2 is building up too quickly, you may want to “burp” your bottles quickly each day (much of the carbonation will remain in the brew itself). You can burp by opening the light just a tiny bit.
If you have a jar / bottle specifically designed for fermentation, there are seals that will allow the CO2 to automatically ‘burp’ itself, so you don’t have the risk of an kombucha bottle explosion. If you don’t have something like this, you will have to monitor the process yourself.
Step 5 of Secondary Ferment: Refrigerate Your Second Ferment Brew
When there’s a good level of carbonation, put the bottles into the refrigerator. This will slow down or stop the action of the yeast, and the CO2 will stop building up as fast. When you’re ready to drink your sparkling kombucha tea, open the bottle carefully. It’s a good idea to do this over a large bowl, bucket, or sink basin, just in case there’s more carbonation than you expect.
If you store your bottles in the refrigerator for more than a week, remember to burp them regularly.
Final Word on Kombucha Brewing
Kombucha is a health-promoting and refreshing drink that’s easy to make and safe to consume by kids and adults, as long as you follow these recommendations on ingredients, brewing techniques and time, storage options, and (most importantly) sanitary guidelines. Now that you have the basics under your belt, try experimenting with more flavor options. Share your brew with your family, share your extra SCOBYs with your friends, and share the joy of kombucha with everyone!
For something similar to Kombucha, why not try making water kefir? It’s got the same texture (and can be fizzy if you second ferment it) but is a bit lighter.








Платформа 1win для онлайн азартных игр — известная онлайн платформа для интернет-азартных игр. Оно предлагает разнообразный выбор слотов, карточных игр и спортивных ставок в интуитивно понятном интерфейсе. Приветственные бонусы и регулярные акции делают игровой процесс прибыльной и интересной. Безупречная работа сайта и оперативные выплаты делают 1win оптимальным выбором для фанатов азартных игр. Постоянно обновляемое рабочее зеркало в телеграм канале – https://t.me/s/zerkalo_1win_rabochee_nasegodnya.
Эффективные стратегии арбитража трафика для повышения прибыли, которые помогут вам заработать больше.
Почему арбитраж трафика – это отличная возможность для заработка, с минимальными вложениями.
Где искать высокодоходные источники трафика для вашего проекта, для оптимизации конверсии и увеличения прибыли.
Секреты эффективного таргетирования для максимального конверта, для обеспечения высокой отдачи от инвестиций.
Как зарабатывать на арбитраже трафика без риска проигрыша, при помощи умных тактик и инновационных решений.
арбитраж рекламного трафика [url=https://traffic-arbitrage.com/]арбитраж рекламного трафика[/url] .
A reliable SEO company for improving search engine rankings, professional help in the field of SEO.
How to make the right choice of an SEO agency, recommendations from specialists.
Benefits of cooperating with an SEO company, what to expect from cooperation.
Assessment of market leaders in SEO services, customers’ experience.
Why an SEO company is necessary for your business, main advantages.
search engine agency [url=http://www.seorg-seo.com]http://www.seorg-seo.com[/url] .
Wedding Bells Productions: turnkey weddings, rely on.
wedding videographer chicago [url=https://bestwedding-video.com/locations/chicago/]https://bestwedding-video.com/locations/chicago/[/url] .
Выгодные предложения по кредиту под залог, ознакомьтесь.
кредит в банке в залог квартиры [url=http://www.ctekc.ru]http://www.ctekc.ru[/url] .
продвижение сайта частный [url=https://www.kvartiry-na-kipre.ru]https://www.kvartiry-na-kipre.ru[/url] .
Great post! I learned something new and interesting, which I also happen to cover on my blog. It would be great to get some feedback from those who share the same interest about Website Promotion, here is my website https://admin.byggebasen.dk/handlers/proxyhandler.ashx?url=http://uy9.de/3-gruende-warum-ihre-website-keine-kunden-anlockt Thank you!
Great job site admin! You have made it look so easy talking about that topic, providing your readers some vital information. I would love to see more helpful articles like this, so please keep posting! I also have great posts about Airport Transfer, check out my weblog at http://gc-intersoft.ru/bitrix/redirect.php?goto=http://uq5.de/flyingstar/flughafentransfer-frankfurt-mainz
Do they have a bladder training program cialis 20mg for sale
XEvil 5.0 automatically solve most kind of captchas,
Including such type of captchas: ReCaptcha v.2, ReCaptcha v.3, Hotmail (Microsoft), Google captcha, Solve Media, BitcoinFaucet, Steam, Amazon, Twitter, Microsoft, Twitch, Outlook, +12k
+ hCaptcha, ArkoseLabs FunCaptcha, ReCaptcha Enterprize supported in new XEvil 6.0!
1.) Fast, easy, precisionly
XEvil is the fastest captcha killer in the world. Its has no solving limits, no threads number limits
you can solve even 1.000.000.000 captchas per day and it will cost 0 (ZERO) USD! Just buy license for 59 USD and all!
2.) Several APIs support
XEvil supports more than 6 different, worldwide known API: 2captcha.com, anti-captcha (antigate), RuCaptcha, DeathByCaptcha, etc.
just send your captcha via HTTP request, as you can send into any of that service – and XEvil will solve your captcha!
So, XEvil is compatible with hundreds of applications for SEO/SMM/password recovery/parsing/posting/clicking/cryptocurrency/etc.
3.) Useful support and manuals
After purchase, you got access to a private tech.support forum, Wiki, Skype/Telegram online support
Developers will train XEvil to your type of captcha for FREE and very fast – just send them examples
4.) How to get free trial use of XEvil full version?
– Try to search in Google “Home of XEvil”
– you will find IPs with opened port 80 of XEvil users (click on any IP to ensure)
– try to send your captcha via 2captcha API ino one of that IPs
– if you got BAD KEY error, just tru another IP
– enjoy! 🙂
– (its not work for hCaptcha!)
WARNING: Free XEvil DEMO does NOT support ReCaptcha, hCaptcha and most other types of captcha!
http://xrumersale.site/
XEvil 6.0 automatically solve most kind of captchas,
Including such type of captchas: ReCaptcha-2, ReCaptcha-3, Hotmail (Microsoft), Google captcha, SolveMedia, BitcoinFaucet, Steam, Amazon, Twitter, Microsoft, Twitch, Outlook, +12000
+ hCaptcha, ArkoseLabs FunCaptcha, ReCaptcha Enterprize supported in new XEvil 6.0!
1.) Fast, easy, precisionly
XEvil is the fastest captcha killer in the world. Its has no solving limits, no threads number limits
you can solve even 1.000.000.000 captchas per day and it will cost 0 (ZERO) USD! Just buy license for 59 USD and all!
2.) Several APIs support
XEvil supports more than 6 different, worldwide known API: 2Captcha, anti-captchas.com (antigate), RuCaptcha, DeathByCaptcha, etc.
just send your captcha via HTTP request, as you can send into any of that service – and XEvil will solve your captcha!
So, XEvil is compatible with hundreds of applications for SEO/SMM/password recovery/parsing/posting/clicking/cryptocurrency/etc.
3.) Useful support and manuals
After purchase, you got access to a private tech.support forum, Wiki, Skype/Telegram online support
Developers will train XEvil to your type of captcha for FREE and very fast – just send them examples
4.) How to get free trial use of XEvil full version?
– Try to search in Google “Home of XEvil”
– you will find IPs with opened port 80 of XEvil users (click on any IP to ensure)
– try to send your captcha via 2captcha API ino one of that IPs
– if you got BAD KEY error, just tru another IP
– enjoy! 🙂
– (its not work for hCaptcha!)
WARNING: Free XEvil DEMO does NOT support ReCaptcha, hCaptcha and most other types of captcha!
http://xrumersale.site/
XEvil 5.0 automatically solve most kind of captchas,
Including such type of captchas: ReCaptcha-2, ReCaptcha v.3, Hotmail (Microsoft), Google, Solve Media, BitcoinFaucet, Steam, Amazon, Twitter, Microsoft, Twitch, Outlook, +12000
+ hCaptcha, ArkoseLabs FunCaptcha, ReCaptcha Enterprize supported in new XEvil 6.0!
1.) Fast, easy, precisionly
XEvil is the fastest captcha killer in the world. Its has no solving limits, no threads number limits
you can solve even 1.000.000.000 captchas per day and it will cost 0 (ZERO) USD! Just buy license for 59 USD and all!
2.) Several APIs support
XEvil supports more than 6 different, worldwide known API: 2captcha.com, anti-captchas.com (antigate), rucaptcha.com, death-by-captcha, etc.
just send your captcha via HTTP request, as you can send into any of that service – and XEvil will solve your captcha!
So, XEvil is compatible with hundreds of applications for SEO/SMM/password recovery/parsing/posting/clicking/cryptocurrency/etc.
3.) Useful support and manuals
After purchase, you got access to a private tech.support forum, Wiki, Skype/Telegram online support
Developers will train XEvil to your type of captcha for FREE and very fast – just send them examples
4.) How to get free trial use of XEvil full version?
– Try to search in Google “Home of XEvil”
– you will find IPs with opened port 80 of XEvil users (click on any IP to ensure)
– try to send your captcha via 2captcha API ino one of that IPs
– if you got BAD KEY error, just tru another IP
– enjoy! 🙂
– (its not work for hCaptcha!)
WARNING: Free XEvil DEMO does NOT support ReCaptcha, hCaptcha and most other types of captcha!
http://XEvil.Net/
You’ve done an impressive work on your website in covering the topic. I am working on content about Thai-Massage and thought you might like to check out https://www.eldin.ru:443/bitrix/redirect.php?goto=http://59n.de/warum-massage-mehr-ist-als-nur-entspannung and let me what you think.
XEvil 6.0 automatically solve most kind of captchas,
Including such type of captchas: ReCaptcha-2, ReCaptcha v.3, Hotmail, Google captcha, SolveMedia, BitcoinFaucet, Steam, Amazon, Twitter, Microsoft, Twitch, Outlook, +12k
+ hCaptcha, ArkoseLabs FunCaptcha, ReCaptcha Enterprize supported in new XEvil 6.0!
1.) Fast, easy, precisionly
XEvil is the fastest captcha killer in the world. Its has no solving limits, no threads number limits
you can solve even 1.000.000.000 captchas per day and it will cost 0 (ZERO) USD! Just buy license for 59 USD and all!
2.) Several APIs support
XEvil supports more than 6 different, worldwide known API: 2captcha.com, anti-captcha (antigate), RuCaptcha, DeathByCaptcha, etc.
just send your captcha via HTTP request, as you can send into any of that service – and XEvil will solve your captcha!
So, XEvil is compatible with hundreds of applications for SEO/SMM/password recovery/parsing/posting/clicking/cryptocurrency/etc.
3.) Useful support and manuals
After purchase, you got access to a private tech.support forum, Wiki, Skype/Telegram online support
Developers will train XEvil to your type of captcha for FREE and very fast – just send them examples
4.) How to get free trial use of XEvil full version?
– Try to search in Google “Home of XEvil”
– you will find IPs with opened port 80 of XEvil users (click on any IP to ensure)
– try to send your captcha via 2captcha API ino one of that IPs
– if you got BAD KEY error, just tru another IP
– enjoy! 🙂
– (its not work for hCaptcha!)
WARNING: Free XEvil DEMO does NOT support ReCaptcha, hCaptcha and most other types of captcha!
http://XEvil.Net/
XEvil 6.0 automatically solve most kind of captchas,
Including such type of captchas: ReCaptcha v.2, ReCaptcha-3, Hotmail (Microsoft), Google captcha, SolveMedia, BitcoinFaucet, Steam, Amazon, Twitter, Microsoft, Twitch, Outlook, +12000
+ hCaptcha, ArkoseLabs FunCaptcha, ReCaptcha Enterprize supported in new XEvil 6.0!
1.) Fast, easy, precisionly
XEvil is the fastest captcha killer in the world. Its has no solving limits, no threads number limits
you can solve even 1.000.000.000 captchas per day and it will cost 0 (ZERO) USD! Just buy license for 59 USD and all!
2.) Several APIs support
XEvil supports more than 6 different, worldwide known API: 2Captcha, anti-captchas.com (antigate), RuCaptcha, DeathByCaptcha, etc.
just send your captcha via HTTP request, as you can send into any of that service – and XEvil will solve your captcha!
So, XEvil is compatible with hundreds of applications for SEO/SMM/password recovery/parsing/posting/clicking/cryptocurrency/etc.
3.) Useful support and manuals
After purchase, you got access to a private tech.support forum, Wiki, Skype/Telegram online support
Developers will train XEvil to your type of captcha for FREE and very fast – just send them examples
4.) How to get free trial use of XEvil full version?
– Try to search in Google “Home of XEvil”
– you will find IPs with opened port 80 of XEvil users (click on any IP to ensure)
– try to send your captcha via 2captcha API ino one of that IPs
– if you got BAD KEY error, just tru another IP
– enjoy! 🙂
– (its not work for hCaptcha!)
WARNING: Free XEvil DEMO does NOT support ReCaptcha, hCaptcha and most other types of captcha!
http://XEvil.Net/
XEvil 5.0 automatically solve most kind of captchas,
Including such type of captchas: ReCaptcha v.2, ReCaptcha v.3, Hotmail, Google, SolveMedia, BitcoinFaucet, Steam, Amazon, Twitter, Microsoft, Twitch, Outlook, +12000
+ hCaptcha, ArkoseLabs FunCaptcha, ReCaptcha Enterprize supported in new XEvil 6.0!
1.) Fast, easy, precisionly
XEvil is the fastest captcha killer in the world. Its has no solving limits, no threads number limits
you can solve even 1.000.000.000 captchas per day and it will cost 0 (ZERO) USD! Just buy license for 59 USD and all!
2.) Several APIs support
XEvil supports more than 6 different, worldwide known API: 2captcha.com, anti-captcha (antigate), rucaptcha.com, DeathByCaptcha, etc.
just send your captcha via HTTP request, as you can send into any of that service – and XEvil will solve your captcha!
So, XEvil is compatible with hundreds of applications for SEO/SMM/password recovery/parsing/posting/clicking/cryptocurrency/etc.
3.) Useful support and manuals
After purchase, you got access to a private tech.support forum, Wiki, Skype/Telegram online support
Developers will train XEvil to your type of captcha for FREE and very fast – just send them examples
4.) How to get free trial use of XEvil full version?
– Try to search in Google “Home of XEvil”
– you will find IPs with opened port 80 of XEvil users (click on any IP to ensure)
– try to send your captcha via 2captcha API ino one of that IPs
– if you got BAD KEY error, just tru another IP
– enjoy! 🙂
– (its not work for hCaptcha!)
WARNING: Free XEvil DEMO does NOT support ReCaptcha, hCaptcha and most other types of captcha!
http://xrumersale.site/
XEvil 5.0 automatically solve most kind of captchas,
Including such type of captchas: ReCaptcha v.2, ReCaptcha v.3, Hotmail, Google, Solve Media, BitcoinFaucet, Steam, Amazon, Twitter, Microsoft, Twitch, Outlook, +12000
+ hCaptcha, ArkoseLabs FunCaptcha, ReCaptcha Enterprize supported in new XEvil 6.0!
1.) Fast, easy, precisionly
XEvil is the fastest captcha killer in the world. Its has no solving limits, no threads number limits
you can solve even 1.000.000.000 captchas per day and it will cost 0 (ZERO) USD! Just buy license for 59 USD and all!
2.) Several APIs support
XEvil supports more than 6 different, worldwide known API: 2Captcha, anti-captcha (antigate), RuCaptcha, DeathByCaptcha, etc.
just send your captcha via HTTP request, as you can send into any of that service – and XEvil will solve your captcha!
So, XEvil is compatible with hundreds of applications for SEO/SMM/password recovery/parsing/posting/clicking/cryptocurrency/etc.
3.) Useful support and manuals
After purchase, you got access to a private tech.support forum, Wiki, Skype/Telegram online support
Developers will train XEvil to your type of captcha for FREE and very fast – just send them examples
4.) How to get free trial use of XEvil full version?
– Try to search in Google “Home of XEvil”
– you will find IPs with opened port 80 of XEvil users (click on any IP to ensure)
– try to send your captcha via 2captcha API ino one of that IPs
– if you got BAD KEY error, just tru another IP
– enjoy! 🙂
– (its not work for hCaptcha!)
WARNING: Free XEvil DEMO does NOT support ReCaptcha, hCaptcha and most other types of captcha!
http://XEvil.Net/
XEvil 6.0 automatically solve most kind of captchas,
Including such type of captchas: ReCaptcha-2, ReCaptcha v.3, Hotmail, Google, Solve Media, BitcoinFaucet, Steam, Amazon, Twitter, Microsoft, Twitch, Outlook, +12k
+ hCaptcha, ArkoseLabs FunCaptcha, ReCaptcha Enterprize supported in new XEvil 6.0!
1.) Fast, easy, precisionly
XEvil is the fastest captcha killer in the world. Its has no solving limits, no threads number limits
you can solve even 1.000.000.000 captchas per day and it will cost 0 (ZERO) USD! Just buy license for 59 USD and all!
2.) Several APIs support
XEvil supports more than 6 different, worldwide known API: 2Captcha, anti-captcha (antigate), rucaptcha.com, DeathByCaptcha, etc.
just send your captcha via HTTP request, as you can send into any of that service – and XEvil will solve your captcha!
So, XEvil is compatible with hundreds of applications for SEO/SMM/password recovery/parsing/posting/clicking/cryptocurrency/etc.
3.) Useful support and manuals
After purchase, you got access to a private tech.support forum, Wiki, Skype/Telegram online support
Developers will train XEvil to your type of captcha for FREE and very fast – just send them examples
4.) How to get free trial use of XEvil full version?
– Try to search in Google “Home of XEvil”
– you will find IPs with opened port 80 of XEvil users (click on any IP to ensure)
– try to send your captcha via 2captcha API ino one of that IPs
– if you got BAD KEY error, just tru another IP
– enjoy! 🙂
– (its not work for hCaptcha!)
WARNING: Free XEvil DEMO does NOT support ReCaptcha, hCaptcha and most other types of captcha!
http://xrumersale.site/