How To Cut A SCOBY In Half
We all know you can produce a baby SCOBY from the mother by simply brewing Kombucha. But this is not the only method of ‘reproducing’ a SCOBY. You can also cut it into pieces and use those pieces as a new SCOBY in different containers!
Why Cut / Divide a SCOBY?
Normally, you don’t need to cut up SCOBYs — you just use the baby SCOBY that forms naturally when brewing. But there a few reasons why you might want to cut one up.
1. You Want to Bring a SCOBY Abroad (or on your person when you travel)
You want to travel somewhere for a few weeks and did not want to haul around an entire SCOBY + liquid to the new location (in this case, cutting a quarter or half a SCOBY and using this as the new SCOBY is much to transport with). It’s easy to clip a piece of a SCOBY and carry it onto a plane with you.
2. You want to start brewing Kombucha in multiple containers
If you wait long enough, you’ll get multiple SCOBY babies — more than you know what to do with. But this takes time (roughly a new baby scoby every 2 weeks of brewing). But this requires you to wait around for weeks. Sometimes you want a SCOBY right now!
3. You want to give a friend a SCOBY and you don’t have a baby available
Sometimes you don’t have any extra SCOBYs available, but you want to give a friend or family member a SCOBY right now. What do you do? Why, cut off a piece of your current SCOBY and give it to them!
4. You need to trim down your SCOBY because it’s too thick
Cutting a SCOBY in half is also a quick and easy way to divide a SCOBY that is too big for your container. For example, if you decide to grow a SCOBY from scratch using a container with a large opening (such as a glass mixing bowl), the colony will spread out until it touches the edge on all sides. If you’ve used a large bowl, you will end up with a SCOBY that’s about 12 inches across! Unfortunately, since large glass bowls aren’t the best containers for kombucha when you’re actually brewing kombucha tea on a regular basis, you’ll have to move your new SCOBY to something like a half-gallon jar or a continuous brewing container which has a much smaller diameter.
How to Divide Your SCOBY with a Knife
Here’s how to cut up your SCOBY.
Step 1: Clean Hands, Clean Equipment
When you’re handling the SCOBY, you want to make sure that you aren’t accidentally introducing any bad bacteria or mold into the colony. This is especially true when you’re cutting the SCOBY apart and creating vulnerable surfaces where these invading microorganisms could burrow in and harm the SCOBY’s natural yeasts and bacteria.
Wash your hands with unscented soap, and rinse them thoroughly. Don’t use anti-bacterial soap or handwash that will harm the SCOBY’s own bacterial population. If you’re rinsing your hands in tap water, do a second rinse in distilled white vinegar to get rid of any residual chemicals from the treated water (most city water is treated with things that can harm the SCOBY). Let your hands air dry, or use a clean paper towel to wipe them off.
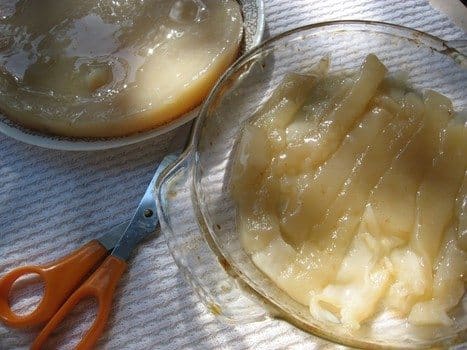
You can use a knife, a pair of scissors, or a razor blade to cut the SCOBY in half. No matter which implement you choose, it should be perfectly clean and rinsed free of any soap residue. Because the SCOBY may react negatively to any other metal, be sure that the implement you’re using is made out of stainless steel. It’s a good idea to rinse the implement in distilled white vinegar before you use it.
If you’re using a knife or a pair of scissors, they should be very sharp, to avoid damaging or tearing the SCOBY.
Step 2: Rinse the SCOBY
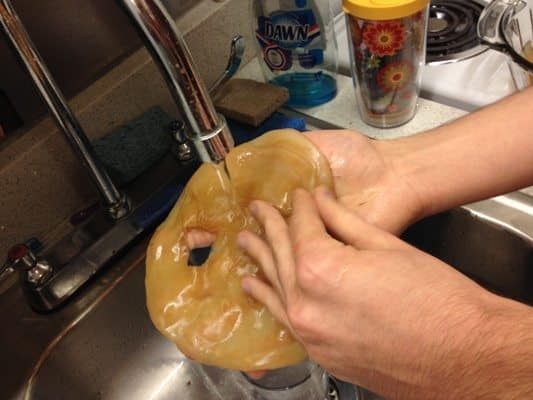
If you’re cutting apart a SCOBY that has been in your SCOBY hotel for a while, there will probably be some brownish strands and clumps of material hanging off the bottom or the sides, but this is normal for a healthy SCOBY. Though it might look like seaweed or mold, it’s just colonies of extra yeast that have developed outside the main body of the SCOBY. Some people like to rinse off this extra yeast and start over with a “clean” SCOBY. If you’ve noticed a yeasty flavor or odor to your kombucha, it might be a good idea to rinse it, but if you don’t suspect any problems or contamination, then you don’t need to do this.
If you are going to rinse your SCOBY, be sure to use room-temperature distilled or filtered water. Tap water often contains chlorine, which will harm the SCOBY. Add a splash of distilled white vinegar to the water to kill off any other possible contaminants.
Step: Decide How to Cut It (Horizontal vs. Vertical Cut)
There is a bit of a difference between horizontally cutting the SCOBY and vertically cutting it. They are not necessarily the same and you should know when to divide to do each type of cut.
In general, we recommend you just remove the BABY from the mother by peeling it away as normal. If it’s fused together, then cut the new baby layers off horizontally with a knife. However, if the SCOBY is really fused together, or the SCOBY is too wide for your container, or you are in a rush and don’t want to wait for a proper baby to form before dividing, then opt for the vertical cut.
Horizontal Cut (with the layers)
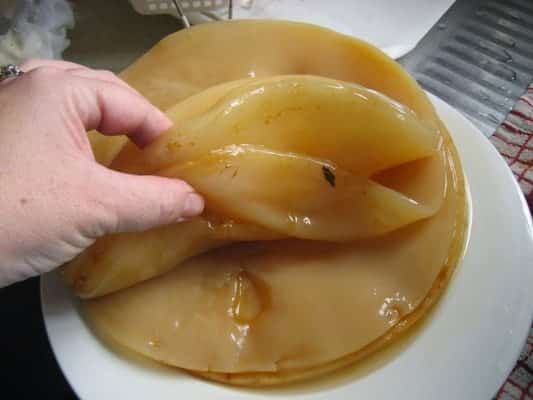
When you’re separating a SCOBY to remove the newer layers on top from the older layers below, you’ll be making a horizontal cut. The younger (top) section of the SCOBY should be at least 1/8 to 1/4 inch thick, and 1/2 inch is even better when you want to ensure the stability and viability of the SCOBY.
This follows along with the standard way of dividing a SCOBY by peeling the baby from the mother, but in this case, you are assisting that peeling with a knife cut.
Vertical Cut (cutting it in half):
If you’re dividing a SCOBY that’s too big horizontally and you opt to make a VERTICLE cut, you’re going to be cutting through young and old layers rather than just removing the baby layers from the mother layer.
If your SCOBY is not very old, that’s not going to be a problem. However, if you pull an older SCOBY out of your SCOBY hotel and cut that one in half, you’re going to have very old layers at the bottom, and very young layers at the top. Although the piece of SCOBY you’ve cut will grow into its new shape to match the container you put it in, it may grow unevenly, because the younger layers will tend to reproduce more quickly.
For the best results, don’t use this vertical division if you can see a significant difference between the top layers and the bottom layers in terms of color and consistency.
Step 5: Cut SCOBY Vertically with Knife
In this case, we are going to cut the SCOBY vertically. It’s easier to do, less of a chance that you’ll cut your fingers.
1. Remove SCOBY: Remove the SCOBY from the jar and place on a clean, flat surface like a glass plate or plastic/wood cutting board.
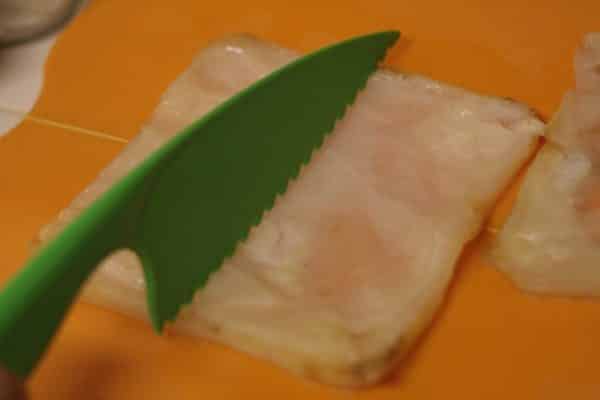
2. Cut SCOBY: Take a sharp stainless steel knife or pair of scissors and cut the SCOBY in half (if it’s a really big, oversized SCOBY, you can even cut it into quarter pieces). Make sure you press firmly downwards — you don’t want to tear up more of the SCOBY than you need to — like you are cutting a thick piece of steak in half.
3. Put Pieces in New Container to Brew: Take each resulting piece and put them into a new kombucha brewing container with sweet tea AND kombucha starter (see our How to Make Kombucha — this is the standard step. Treat the divided SCOBY as you would any new SCOBY you have just removed from a kombucha batch and are starting a new new brew.
Step 6: Using the Cut Pieces
You can use the pieces of the SCOBY right away to make more kombucha, or put them in your SCOBY hotel. If you’ve cut up a SCOBY to share it with a friend, be sure to give them at least half a cup of “starter” (the concentrated kombucha from your SCOBY hotel) or two cups of fresh kombucha tea (unflavored).
In a pinch if you don’t have the room for a full starter when you travel, you can just put one of the pieces in a small plastic bag, without starter, and transport it for a day or two to a new location (say put it in your check-in suitcase for a 15 hour flight to another country). You’ll need to put it into a new sweet tea mix in the next 24 hours..and you’ll need to use spirit vinegar as the 2 cups of starter liquid, but if you do this, you don’t need to pack any starter with you.
If you think that the piece of the SCOBY is too small, you can add more than one to your brewing container. They will grow together and form a single colony that covers the top of the liquid in the container.
Some people prefer to store the pieces of a cut-up SCOBY in the SCOBY hotel for several weeks before using them, in order to give the SCOBY time to reorganize as a colony and to expand into its new shape. If you do put your SCOBYs into storage, think about storing them in separate smaller jars at first, so that they have a chance to develop evenly without growing into each other. After all, if they grow together, you’ll just have to cut them apart again!
Note that if you start brewing from a cut up SCOBY (a few inches say), it may take a few brewing cycles before you get a fully functional SCOBY. It usually takes much longer to brew Kombucha at the start using a little piece of SCOBY — especially if you’ve hauled it around on a plan without start liquid. But it will start producing regular, quality Kombucha after a few brew cycles (which will take longer than normal).
Is It Really Necessary To Cut Up a SCOBY?
Eventually, yes.
A SCOBY that’s got enough liquid and nutrients will just keep growing, and if you leave a SCOBY alone, you’ll end up with a single SCOBY that takes up a great deal of vertical space in your jar. There may be different layers that naturally separate into discrete colonies, or all of the layers may fuse together. The larger the SCOBY, the more liquid and space it will need, and at some point it will become impractical to use as the culture for your kombucha brewing system. Whether you separate the SCOBY by peeling the layers apart or by cutting it into pieces, it’s a good idea to keep the overall quality of your culture high by discarding the oldest parts of the colony and only using the newest ones.
However, if you regularly remove the baby SCOBY from the mother you can keep a single original mother going while also keeping it at a useful size. You can use the mother as your brewing culture, and separate and store the new baby SCOBYs, or you can keep the mother in a hotel and remove the baby SCOBYs to use when brewing kombucha tea.
What If I Cut The SCOBY Wrong?
Relex, SCOBYs are very hardy. It takes some serious effort on your part to kill one. If you cut the pieces too small or cut it uneven, or tear it up a bit with the knife, your SCOBY pieces will still eventually reform into the proper shape after a number of brewing cycles, as long as you feed it the right stuff (tea + sugar).
You can even pretty much take a whole SCOBY, put it into the blender to grind it up into tiny pieces (SCOBY smoothy), put it back (or part of the mix) into a new batch of KOMBUCHA brew and the SCOBY will reform at the top of the container.
So, you really don’t have to worry too much when it comes to cutting up your SCOBY — as long as you put the pieces into sweet tea and let it sit, you’ll have a new SCOBY and new kombucha soon enough.


