How to Brew Kombucha Wine
Did you know that it is possible to turn your ordinary booch into something with more of a kick? Kombucha can be made into a variety of mildly alcoholic beverages such as kombucha beer, wine, ale, and even a kombucha champagne.
And yes, we have a boozy tutorial for each of these alcohols, made from a Kombucha base.
Although these alcoholic variations are highly experimental and results are not always guaranteed, it is more than possible to brew up some very tasty beverages – with the power to give a heady buzz as well!
Kombucha Wine – What to Expect
Difficulty
In this set of guidelines we are going to be walking you through how to make kombucha wine. Kombucha wine can be slightly easier than kombucha beer to get good results with, and depending on your variables it can come out tasting really good too.
Taste
The flavor profile will depend on what flavoring you use, with a sweet/tart balance and often yeasty undertones. In the case of kombucha wine, yeasty flavors are not really one’s goal, but can be difficult to avoid completely.
Required Equipment
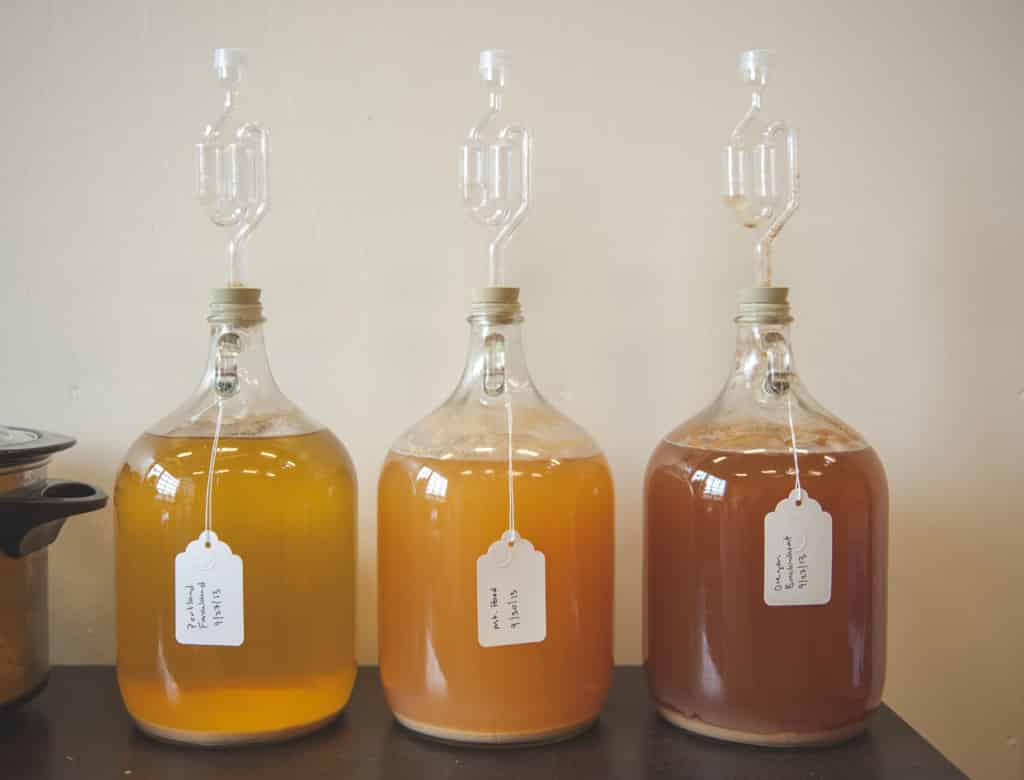
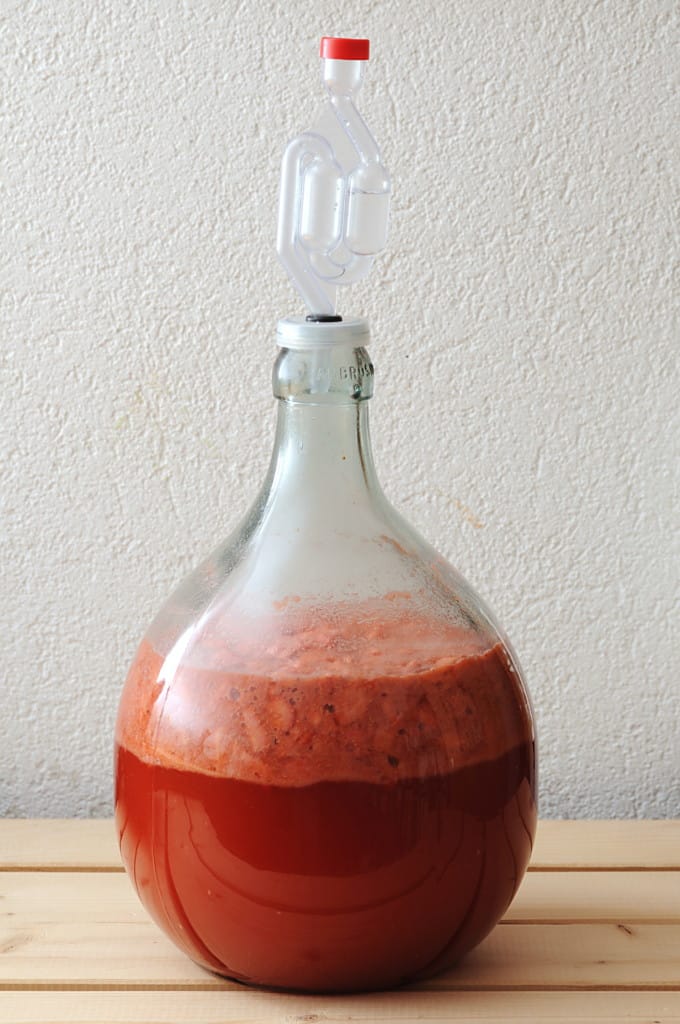
When making kombucha wine it is vital to have a bit of a home brewing setup ready before you start. The basics of home brewing systems usually consist of a carboy and an airlock. The carboy is a large vat in which the brew ferments. It is sealed, which makes for anaerobic fermentation. Airlocks are fitted to the opening to allow pressure to escape while not allowing fresh oxygen in. This is very important, for if your brew is sealed sans airlock – you are at risk of some nasty explosions. The internet is full of pictures and accounts of people who have injured themselves in an exploding carboy episode because they did not use airlocks.
If you do not have or want to get a brewing setup, then it is possible to simply increase the alcohol levels of kombucha mildly by making adjustments to the primary ferment. Pairing this with adding some sugar to the second ferment, and you might be able to get an extra few percent. However it is highly unlikely that you will be able to achieve anything stronger percentage wise than an extra light beer.
Before we get into the recipe, let’s walk through the basic process and principles behind kombucha wine making.
The Basic Process Behind Making Kombucha Wine
Making kombucha wine consists of three main stages. The primary ferment which consists of ordinary kombucha making with a couple tweaks to increase alcohol levels, the secondary ferment where you will pull out your brewing setup to achieve notably alcohol levels and rich flavors, and the bottling stage where your kombucha wine will age.
How to Up the Alcohol Content of the Primary Ferment
As mentioned above, altering a couple things in the primary ferment can up your alcohol levels abit. When making kombucha wine, this is the first step. Increasing alcohol levels in the primary ferment will compound what can be achieved in the secondary ferment. This is achieved mainly by aiding and abetting the yeasts within your kombucha.
Kombucha naturally has trace amounts of alcohol present. They are not high enough to make kombucha count as an alcoholic beverage, and the small amounts of alcohol are usually metabolised without one feeling any influences or impairment. These small amounts of alcohol are thanks to the yeasts. While kombucha yeasts are not as adept as beer and wine making yeasts at alcohol production, they do produce some as a by product from metabolising sugars.
Increase & Encourage the Kombucha Yeast
The reason why so little of the alcohol remains in the finished kombucha is because the bacteria component of the kombucha SCOBY in turn feeds on this alcohol and turns it into natural acids. These natural acids are one of the extremely healthy elements of kombucha, and so are definitely not a bad thing. However for the purpose of making an alcoholic variation of kombucha, the aim is to try and encourage the yeasts, so that they can produce more alcohol, and hopefully at the same time outcompete the bacteria a little, so that they do not eat up most of the alcohol.
Take starter liquid which contains the most free floating yeast: The way to do this is simple. Kombucha yeasts can be seen by the naked eye in the form of long brown strings and bits and pieces of debris floating in your kombucha. When setting up the primary ferment of kombucha which is destined to turn into wine, try to incorporate as much of this free floating yeast into your starter liquid as possible.
Add in 50% more sugar: In order to support this heightened amount of yeast within your new batch of kombucha, increase the sugar within your sweet tea recipe by 50%. This will give the yeasts more food to consume, and hopefully they will gain the upper hand on the bacteria.
How to Use the Secondary Ferment to Increase Alcohol Content Further and Make Wine
Once the primary ferment is finished, then it is time to pull out your home brew setup. However, it is not just the home brew set up which turns your kombucha into wine – there are also a couple other extra ingredients which need to go into the secondary ferment. These are wine or champagne yeast, and a source of fruit.
Add in Wine Yeast
Because the kombucha yeasts are not professional alcohol producers – and merely make a bit to keep their bacteria friends in business – you will need to incorporate some wine yeast. Wine yeast is available at homebrewing shops and online. You can also use champagne yeast if you cannot get your hands on wine yeast. Do not use ordinary baking yeast, it will not produce the required amounts of alcohol, and it will turn your brew into a yeasty tasting flop.
Add in Fruit Juice
The next thing you will want to incorporate into the second ferment is a source of flavor. Fruit is a common ingredient for secondary ferment flavoring of kombucha, and it is the most suitable one for the purpose of making kombucha wine. Grape juice of course is an obvious choice seeing as it is the base of ordinary wine. If however you want to experiment with some other type of juice such as cranberry, raspberry, strawberry, papaya, passion fruit, pomegranate etc, go ahead. Kombucha wine making is as a whole experimental, so there are no big rules besides the basic science behind alcohol production.
Add in Sugar
Lastly, to assist the new yeasts in their production of alcohol ,you should add in a source of simple sugar for them to feed on. The fruit juice will also act as a sugar source, but it is a more complex form and therefore is not so easy for the yeasts to metabolize.
How to Use Bottling as a Further Aging Process for your Kombucha Wine
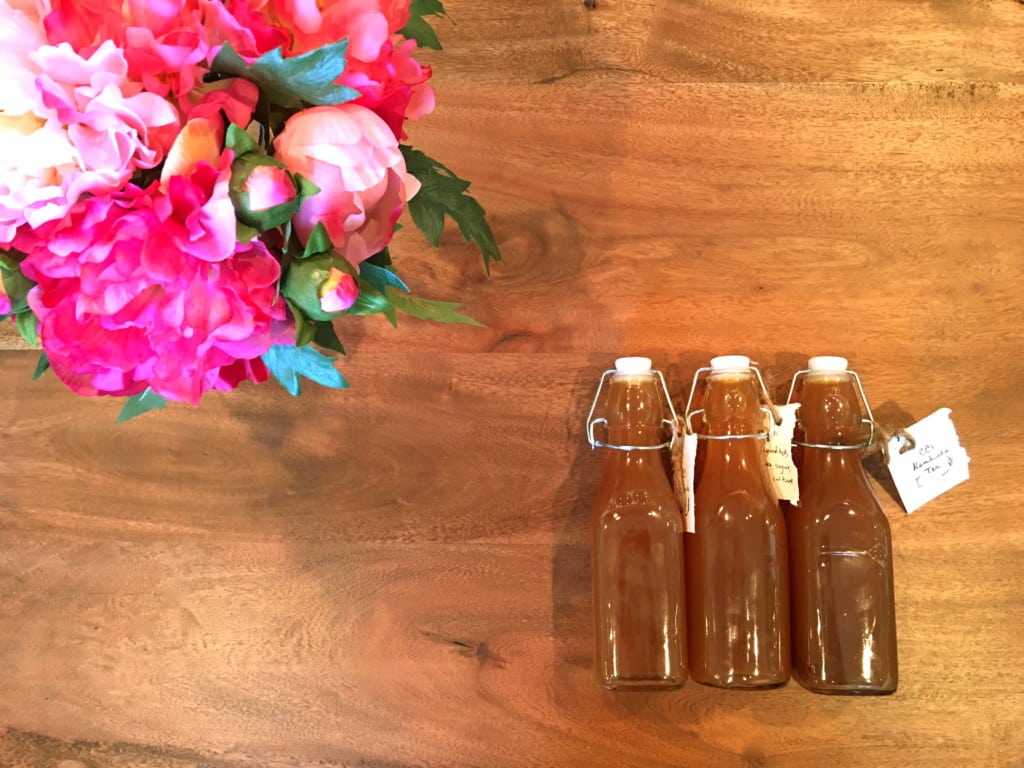
The last stage in kombucha making is the bottling process. This is not very complicated and merely consists of syphoning your completed kombucha wine (congratulations!) into fliptop bottles or capped bottles and storing them in a cool dark place to mature.
How long should kombucha wine mature for?
This is a bit of a difficult question to answer. Some people report best tastes without any maturing. Others have said that their kombucha wine has the nicest flavor after being left to age for as long as 4 months. The best is to experiment, try some fresh, and keep tasting as you age the bottles to determine the point at which it has the best flavor profile.
And there you have it, that is the basic set of strategies for making kombucha wine! Let’s get into the recipe shall we?
Kombucha Wine Recipe
This recipe is for a 1 gallon batch of kombucha wine. You can adjust the quantity as desired, just stick to the ratios. We will be using grape juice as the flavoring, however feel free to substitute any juice of your choice. Then, as outlined above, the process will consist of making the initial ferment, the secondary ferment, and finally the bottling and aging. But first things first!
Get Your Homebrew System Ready
Before setting up your initial kombucha ferment to make kombucha wine, sort out how you are going to set up your home brew system. As far as carboys go, you do not have to use an actual carboy – but whatever you use must be able to be made airtight, have an airlock fitted onto the top, and preferably be made out of glass. Kombucha contains natural acids, that is why it is always recommended to be made in glass vessels.
Why You Must Use a Glass Carboy
The reason for this is that the natural acids in kombucha can eat at substances like plastic and metal, causing invisible leaching of those substances into your ferment. Not good! As the second ferments associated with kombucha wine making often tend to take longer than regular secondary ferments, the likelihood of this leaching happening is even higher.
Carboy Alternatives
If you cannot find a glass carboy or similar container, you can use a few big glass jars on which you can fit airlocks, and split your secondary ferment amongst them. This will mean that you are going to need some additional airlocks, instead of just one. Airlocks however are pretty cheap, and can be used for other fermentations as well, such as fermented vegetables.
Once you have figured out how you are going to do your home brew fermentation setup, you can get your other ingredients and equipment together.
What You Will Need:
Ingredients
- SCOBY
- 3/4 gallon brewed black tea
- 1/5 gallon yeast rich starter liquid
- Sugar (approximately double the usual amount + 1 cup)
- 1 cup grape juice
- 1 cup filtered water
- Wine yeast
Equipment
- You regular kombucha fermentation container and cover
- Carboy (or alternative container)
- Airlock
- Length of plastic hose for syphoning
- Fliptop bottles (or bottles which you can cap if you have a capper)
- Small pot to boil water
- Thermometer (optional)
- Hydrometer (optional)
What to Do:
Make the Kombucha
Step # 1
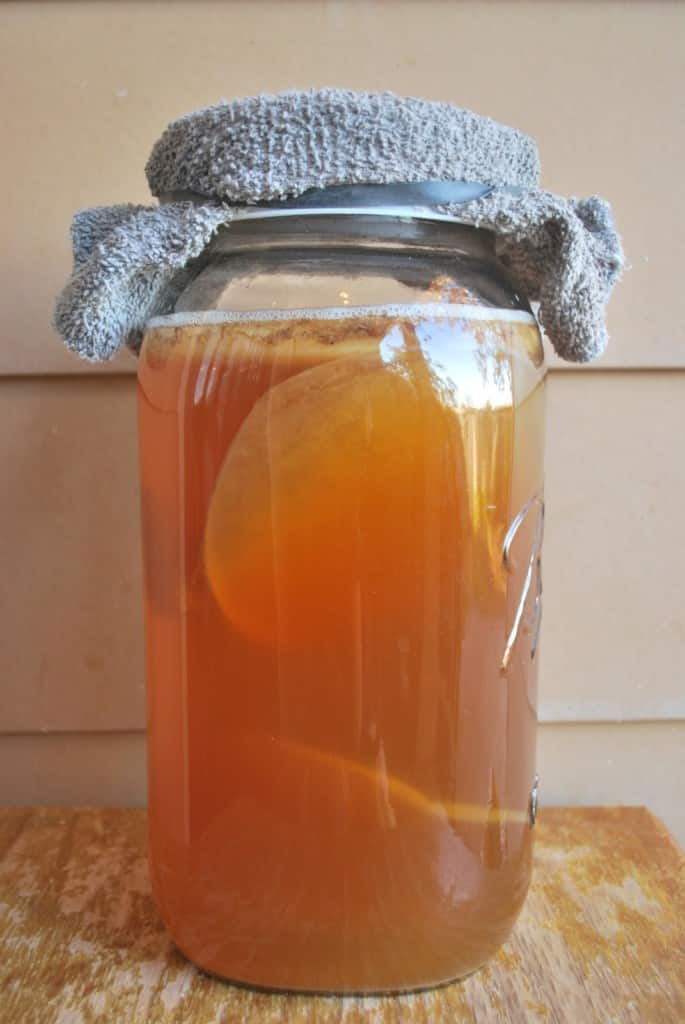
Brew up the sweat black tea as you usually would, adding in the additional 50% sugar. Once cooled combine this with your SCOBY and yeast rich starter liquid in your kombucha fermentation container. Cover and leave to ferment fully. Once the kombucha has fermented to a medium strength – where it is not overly sour and not overly sweet – you can harvest it and move on the next step
Step # 2
Set up you home brewing system with the carboy or carboy alternative and airlock. This should be in a cool place out of direct sunlight and away from pets, children and other high activity elements which could bump into the big glass containers. Once these are ready to go it is time to put together the secondary ferment.
Set Up the Second Ferment
Step # 3
Bring 1 cup of water to the boil in a small pot. Add in and dissolve the cup of sugar. Allow this to cool down to almost room temperature but where it is still warm. Now mix 1/3 of a teaspoon of your wine yeast, stir and allow it to activate. While you are waiting for the yeast to hydrate itself, pour you finished kombucha into the carboy. When the yeast is ready, in about 10 minutes, it should look nice and bubbly. If it is not bubble, then it might be old and inactive. Old yeast will not ferment your kombucha wine.
Step # 4
Once the yeast and sugar mix is ready, you can pour it into the carboy to join the kombucha. Next add the fruit juice. Once all is combined, seal up the carboy and make sure that the airlock is in place and not blocked.
Step # 5
And now you wait. Secondary ferments for turning kombucha into kombucha wine often require a lot more time than an ordinary ferment. You will need to leave your ferment for as long as it takes for the wine yeasts to cease their activity. The way you can tell that this has happened is by noticing when there are no more bubbles coming into the airlock. Then it is time to bottle. Another way you can check readiness is by examining sugar levels using a hydrometer. Test the batch – if the hydrometer shows a reading less than 1, then it is definitely good to go.
Bottle & Store
Step # 6
Once your second ferment is done it is time to bottle. Do this by using a length of hose to syphon the kombucha wine out of the carboy and into fliptops or other bottles which you can cap. Stand the carboy on a table or counter, insert the hose under the surface of the kombucha wine. Suck on the free end to start the flow and quickly insert it into a bottle as soon as the wine starts coming down the pipe. Leave any sludge which might have collected on the bottom on the carboy. This you can discard.
Step # 7
Once you bottled all of you kombucha wine, store it in a dark, cool or cold location for as little as 3 weeks or as long as 3 months. If it is warm where you are, you might want to consider aging the bottles in the refrigerator. The kombucha wine will continue to develop tartness during aging. If it is warm, this will happen too quickly and spoil your brew. While aging your kombucha wine, take out a bottle at intervals and try it. This way you will be able to see when it is at its best. Also, do not forget to taste some when you are decanting – this will give you something to make comparisons to.
Congratulations!
If you are happy with your brew of kombucha wine then congratulations. If you ended up with a flop, do not be disappointed in your abilities. The making of wine or another alcoholic beverage out of kombucha is still in experimental stages. If you are keen to persevere, merely record your ingredients, method and other variables and do a second batch with some adjustments. You might want to change the juice you were using, or the wine yeast. Perhaps you want to stop your primary ferment a little earlier or later. There is lots of room to play – so be a pioneer.
Final Word
Making kombucha itself is fun – making kombucha wine can be even more so! If you get good results it can be very rewarding.
Traditional beer and wine were as probiotic in nature as other fermented items. Nowadays all mass produced fermented alcoholic brews are pasteurized, which renders them devoid of probiotics. Many wines nowadays also contain additives such as sulfur dioxide and preservatives which are toxic. Making your own kombucha wine, while experimental, does mean that you know exactly that is in it.
Beer is another candidate for all sort of harmful additives, so if you wish to learn how to make your own kombucha beer, check out this post. As neither of these drinks is a ‘true’ wine or beer, the process of making kombucha beer is very similar to that of making kombucha wine.
In addition, even if you do not want to get into continual kombucha wine making – perhaps the taste is not to your liking or you find the results too inconsistent – learning about the brewing process can open doors to experimenting with fermenting other alcoholic beverages such as beer or ale.
For more boozy Kombucha tutorials …check out:

