Best Equipment For Brewing Kombucha
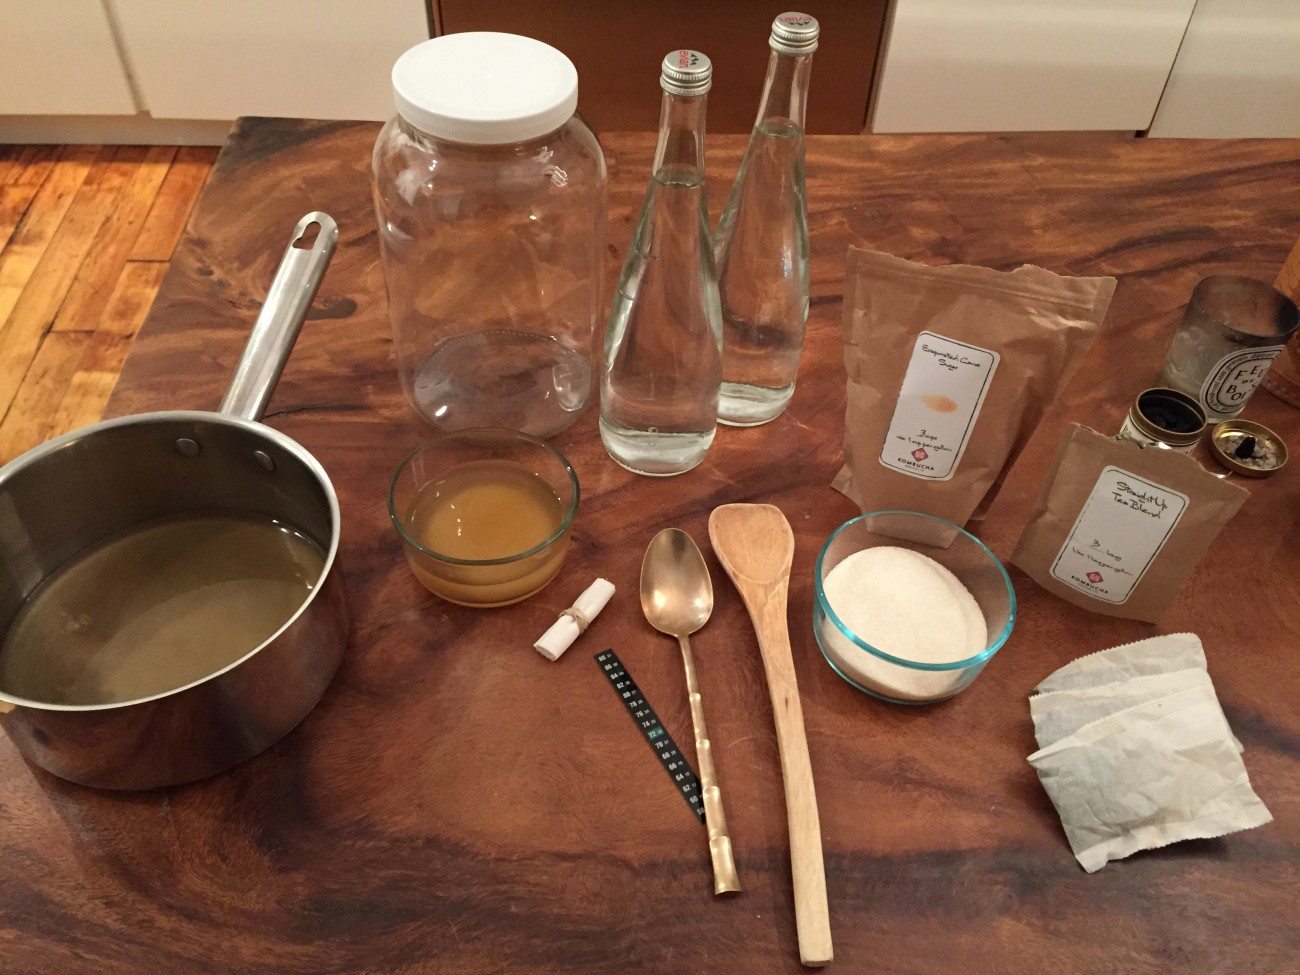
There’s no doubt that you can create delicious, healthy kombucha tea with things you probably already have in your kitchen, and many people are perfectly happy to make a small batch of kombucha using only the bare minimum of supplies. But if you’re interested in setting up a continuous brew system, experimenting with second-ferment flavors, or making more than a gallon of kombucha at a time, you’ll want to check out these recommendations for the best brewing equipment that will make the process easier.
A Note on Sanitation
Remember, no matter how good your equipment is, you need to keep in clean. This is especially important when you’re dealing with things that have narrow and hard-to-clean spaces, like bottling equipment and funnels, or have openings that are too small to get your hands in to clean (like bottles and growlers). When you’re thinking about what equipment to buy, keep in mind that you’ll need to also get the equipment that will help you keep it in good shape and sanitary so that you don’t accidentally introduce contamination into the brewing process. Clean hands, a clean workspace, and clean equipment will help you avoid any potential problems.
Best Tea-Making Equipment
Stainless Steel Pot
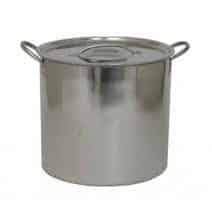
The most simple means of boiling your water and brewing your sweet tea is to use a stainless steel pot to boil the water in.
Although you might be tempted to pull out any old pot from your kitchen cupboard to brew your sweet tea, it’s a good idea to invest in a high-quality stainless steel pot – and to keep it separate from your other kitchen gear. This will simplify cleaning in the long run; after all, you don’t want to have to scrub off stuck-on pasta each time you want to make a batch of kombucha.
How big a pot you want depends on how much brew you make each batch. Keep in mind that most 1 gallon brews of Kombucha will take around 2 weeks to complete and yield only about 12 or 14 cups, after you remove starter for the next batch. So unless you restrict yourself to 1 cup of kombucha per day for a two week period, you are going to need to brew anywhere from 2 gallons to 5 gallons each batch, depending on how much buch you will drink each day and how many people there are in your household.
This means you may want to invest in a larger pot to make your sweet tea with.
Best Steel Pot for Making Sweat Tea
I suggest using this 5 gallon stainless steel pot that costs about $32 USD on Amazon. It’s enough to basically keep you going with 2 to 5 gallons of Kombucha every couple weeks — enough for most households. You can get a smaller pot that brews about 2 gallons, but It’s good to just get one big enough to handle MORE sweet tea should you expand your production.
And if you have a large household and need to make a serious amount of tea for 5 or 6 people, you may want to consider looking at a giant pot that can brew up more than 5 gallons. This 11 gallon steel pot will do the job. Keep in mind you won’t need a pot this big unless you have a family of 4 to 6 people all drinking 2 to 3 cups of Kombucha each day.
Plastic Mesh Strainer
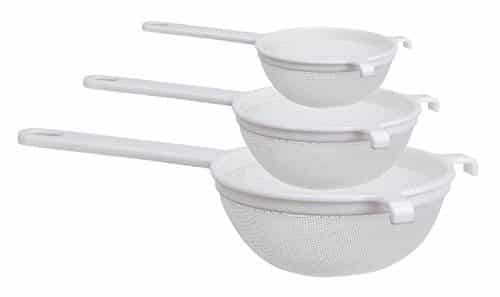
Most people find that an inexpensive set of plastic mesh strainers are handy to have for straining the sweetened tea for the first fermentation, as well as getting any yeasty bits out of the finished brew when they’re ready to bottle (and for cleaning your SCOBY Hotel of excess yeast).
If you add fruit or herbs and spices during your secondary fermentation, you can use the mesh strainers to filter those pieces out as well when you’re ready to drink your kombucha tea.
Best Plastic Mesh Strainer for Kombucha Making
I recommend simple and easy set of 3 plastic mesh strainers from Amazon that’s just under $10 USD. In addition to the various uses for Kombucha making, you can ALSO use these if you want to make kefir to strain the kefir grains.
Tea Strainers (Making the Sweet Tea)
You’ll need to make your tea somehow. The choice is teabags, loose leaf tea, or tea leavers. If you use teabags (though eventually, I highly suggest using organic, tea leaves over tea bags for a better quality and far tastier Kombucha), you can just throw them into the stainless steel pot to make your tea.
Using loose-leaf tea gives you the widest range of possibilities when it comes to the type of tea you use for your brew, but it also leaves you with, well, leaves.
When it comes to Tea Strainers, you have a couple options IF you use loose leaf tea or tea leaves: plastic mesh strainer, french press, tea ball infuser.
Plastic Mesh Strainer: If you use tea leaves though, you’ll need to strain them out of the tea mixture. There are a couple ways to do this. You can use a cheap nylon mesh strainer as listed above, which also be used to strain your finished kombucha brew to remove the yeasty bits. You should be able to strain the tea leaves by pouring the mixture though.
Best Mesh Strainer for Kombucha making
Personally, I recommend you get the OXO Good Grips 3-Piece Funnel and Strainer Set listed below which is basically a strainer AND a funnel in one. Saves you some time and perfect for Kombucha brewing.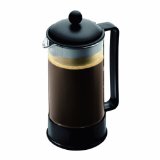 French Press :Another option is to use a large French press to make your tea. Instead of making several gallons of weaker tea, prepare a batch or two of double- or triple-strength tea in the press, and then dilute it with fresh boiling water when you’re ready to add the sugar and start your brew. The stainless steel mesh in the press will catch all of the tea leaves, and it’s easy to clean.
Best French Press to Make Sweet Tea
I personally recommend the Bodum Brazil 8-Cup French Press. It’s only about 20 USD and does the job perfectly.
Tea Ball Infuser: This is my personal favorite method for making the tea (I use tea leaves).
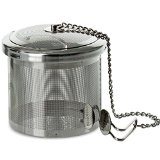
It’s basically a steel ball that you can shove your tea leaves into. Pack it full then drop it into your boiling water and let it sit for 5 or 10 minutes. When the tea is steeped enough, simply pull it out (it comes with a chain you attach to the side of the pot to retrieve it). Open it up and dump out the used tea leaves. Done. Make sure you get a quality Tea Ball Infuser with a fine grain mesh. Some of the cheaper ones out there don’t have a small mesh and if you use small tea leaves or loose leaf tea, they will fall through.
Best Tea Ball Infuser for Kombucha Brewing (to make the tea)
There’s a lot of tea balls or tea infusers on the market. You can get a basic cheap one for under 4 bucks on Amazon. However, I personally recommend this oversized FORLIFE Capsule Infuser (see image beside) which has a very small mesh and is large. It’s a bit more expensive than others at about 20 bucks, BUT it’s the best and you’ll save a lot of wasted time picking out tea leaves that fall through the mesh. This mesh is suitable for loose leaf tea and tea leaves, where as some of the cheaper tea balls won’t handle loose leaf tea. You’ll need about 1-2 tablespoon of tea leaves or 2 tablespoons loose leaf tea per gallon. So if you use a 5 gallon container, you can just about get by 5 to 10 tablespoons of tea leaves packed in there. But you may want to consider 2 of these containers.
Glass, Plastic, and Wooden Kitchen Utensils
You’ll need some way to dissolve the sugar into your tea, to transfer the finished kombucha to bottles, and to measure ingredients when adding flavor to kombucha, and that means kitchen utensils. These can be made of glass, food-safe plastic, or wood.
Mixing Spoons (plastic or stainless steel)
Long kitchen spoons help you mix ingredients. If you choose plastic, make sure it’s heat-safe. If you choose wood, keep those utensils separate from the rest of your kitchen gear so that the flavors don’t transfer.
Avoid aluminum utensils and pick stainless steel, if you want to use metal spoons. Any spoons can do as long as they are plastic, glass or stainless steel and LONG enough to reach into your brewing container / metal pot for tea.
Best Mixing Spoons for Kombucha Making
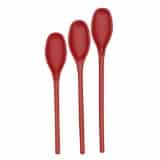
I’m not going to lie here — anything will do. You should have a set of wood mixing spoons or plastic spoons and that’s good enough. You can pick up any plastic spoons or glass mixing spoons at any grocery store. If you want recommendations, then this cheap set of plastic spoons for Good Cook 3-Piece Mixing Spoons Set is a good buy.
Large Measuring Cup
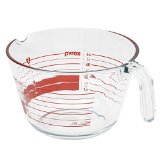
Get one set of glass measuring pitchers, and one set of good-quality plastic measuring spoons, and they’ll last you for years.
Measuring cups are useful for a couple things: to measure the sugar out and to add the sugar into the tea mixture and to transfer the finished brew from the brewing container into bottles or another container. Glass or sturdy food-safe plastic is your best bet here, but you can also use high-quality stainless steel.
Best Measuring Cups for Kombucha Making
I personally recommend the 8 cup Pyrex measuring cup. And there’s a reason why this is better than you generic measuring cup you might have in your cupboard or one that you can buy at your local safeway. The 8 Cup Pyrex is the best measuring cup for Kombucha making because it’s GLASS and it’s 8 cups (not 1 or 2 cups like most measuring cups). This means you can transfer half a gallon of the finished kombucha from brewing container to the final container/bottle sooner than later. 8 cups at once saves you a lot of time and you won’t spill the brew everywhere which may happen if you try pouring the finished brew directly out of the brewing container.
Plastic Funnel
If you’ve got a keen eye and a steady hand, it’s possible to pour your kombucha into bottles or storage jars without using a funnel, but why take the chance of losing some of your precious brew with spills? You can get a good large-mouthed plastic funnel in most grocery stores. Look in the baking section, or the aisle that has pickling and canning supplies.
Or you can buy one online that’s more specialized.
Trust me, you want to have a funnel! Once you’ve finished your brew, you need to transfer it into bottles (either for a second ferment or just to drink) or some other container since presumably you are going to reuse your brewing container to make the next batch of kombucha.
Using a plastic funnel makes transferring your finished batch from the brewing container/s much easier, with no spillage. Using the 8 cup measuring glass and a plastic funnel will save you from a lot of spills – trust me on that.
Best Plastic Funnel for Kombucha Brewing
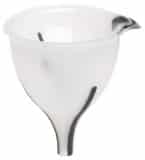
My recommendation for a plastic funnel is the AWESOME B. This works as both a funnel AND a strainer in one. It’s basically a set of three different sized funnels with a little strainer mesh attachment you can put inside the funnel. The mesh turns the funnel into a funnel strainer. Very useful because you can STRAIN your kombucha brew right away from the completed batch as you bottle it. This saves you from having use a strainer separately. Even better, if you make kefir, you can use this to strain out the kefir grains too from your milk!
Kombucha Brewing Containers
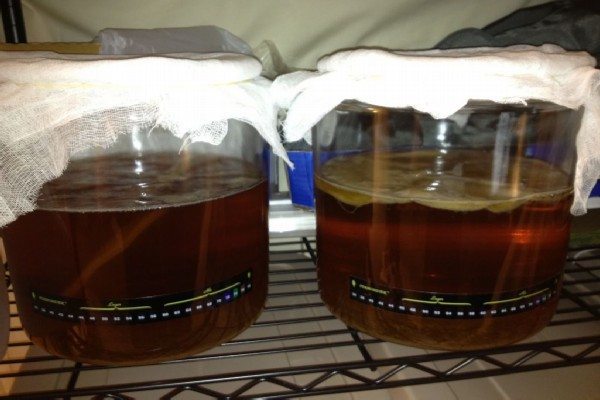
NOTE: This section deals with the containers used in the primary fermentation, which is aerobic – in other words, “with oxygen.” The jars and containers are not closed with anything other than a clean cloth and a rubber/elastic band, to allow the SCOBY to breathe.
First off, we need to figure out roughly HOW MUCH kombucha you want to brew. If we can guestimate this, then we can go about picking out the right size brewing containers to use.
What size brewing containers to choose?
Typically, for one person we recommend you work with a couple 1 gallon (or a single 2 gallon vessel) which will provide you roughly with enough for 2 cups a day. If you want 3 or 4 cups a day, you’ll need to look at doing 4 gallon batches every 2 weeks. If you have a family with multiple people, consider having at least a 5 gallon container — with even a 10 gallon better.
Note: 1 Gallon containers you can put in the fridge. 2 gallon and larger, you might have a problem, though they are more convenient.
However, 1 gallon — assuming your brewing time takes between 7 to 14 days for both first and the optional second fermentation — won’t be enough kombucha for everyday drinking.
Assuming 14 days per brewing cycle and a cup of kombucha each day (a very spartan estimate — I personally love having 2 to 5 cups of the stuff a day) and a gallon at 16 cups, then you will be able to have about 1 cup a day without running dry if you continually brew a gallon every 2 weeks.
Realistically, however, will probably want to enjoy kombucha like the tasty treat it is and drink 3 cups a day. If you have a 4 person family, with each member drinking 2 cups a day, that’s 8 cups a day, or 56 cups a week (3.5 gallons) and 7 gallons every two weeks!
So, to bring all this math to an end, if you want to keep a family of four with consistent kombucha every day, you will need to produce 3.5 gallons a week. Assuming about 14 days average to finish your first and second fermentations, you will need to do 7 gallons of ‘buch’ per two week batches.
If you are only doing 1 gallon batches, you won’t have enough. 2 gallons won’t be enough either. 3 gallons and you can just supply every person in a 5 person family with 1 cup a day.
So as you see, if you want a steady supply of kombucha, you will want to have multiple 1 gallons fermenting or a couple 2 or 3 gallon containers. Or a single really big brewing container — a 5 to 10 gallon one. Or you might want to consider a 5-7 gallon continuous brew system which makes brewing a lot of buch faster to do.
Check out our how much Kombucha to brew article to find out how to calculate how much kombucha to brew every brew cycle.
Glass Jugs
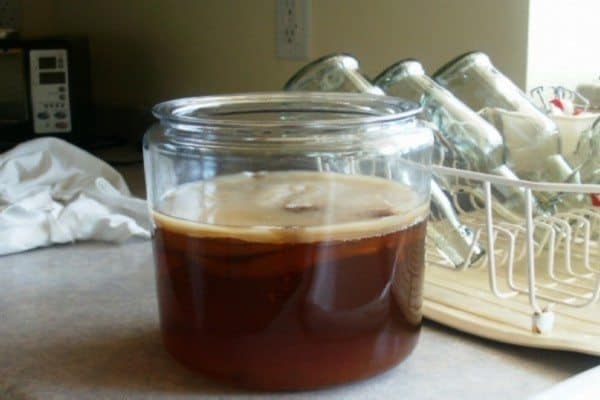
Glass containers are easy to clean and relatively inexpensive. What’s more, glass jars do not react with the acids produced by fermenting kombucha, and that means you won’t risk introducing foreign materials into your kombucha, and the containers will last longer.
Don’t try to use any jar that is made of two or more formed pieces that are glued together at the seams. The seams will weaken over time, and you’ll eventually end up with a liquid mess. Many people find that the one-gallon size is the easiest to use, because it fits into refrigerators and isn’t too heavy when full. These jars are also useful for making SCOBY hotels.
I personally just recommend you use GLASS brewing containers. It’s the cheapest, easiest choice to make.’
Best Glass Vessels for Kombucha Brewing (and Storage)
Anchor 2.5 Gallon Glass Jar ($19.99 on Amazon)
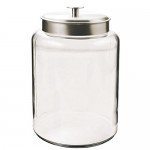
If you want glass jars, there’s a lot of options. Save yourself time and wasted effort and just buy the Anchor 2.5 Gallon Glass Jar. You can make 2 gallons of Kombucha in one go (remember, that’s 2 cups a day of kombucha drinking for 2 weeks). One of these should provide enough Kombucha for the average person. If you want to really down a lot more (3-4 cups), then you’ll need two of these brewing at the same time. If you have a full family of drinkers, then I recommend 3 or 4 of these for brewing with. You can opt for a 1 Gallon jar instead of a 2 gallon jar, but I don’t recommend it. Trust me on this, if you start brewing with 1 gallon, you’ll quickly realize you won’t have enough Kombucha to last between brewing cycles. Just start with 2 gallon and go from there.
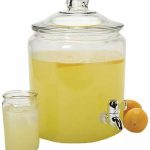
Anchor Hocking 2 gal. Heritage Hill Jar with Spigot
Another option for a glass jar for brewing Kombucha is to use the Anchor 2 Gallon Heritage Jar with a spigot. Everything is exactly the same as the jar above but it has a spigot. This makes it very easy to ‘taste’ the Kombucha brew part way through without needing to remove the top from the jar, push aside the SCOBY, and shive in a beaker or spoon to retrieve a sample for tasting. Simply twist the spigot at the the bottom and you can try it right away! This jar is also useful to use as a small scale Continuous Brew System. Between the two jars listed, I would opt for this one since it’s more flexible and you can use it for a continuous brew system if you want to try that method. Or don’t, but you have the option.
Note, YOU MUST SWITCH OUT THE DEFAULT SPIGOT that comes with it with a stainless steel one. The outside of the default spigot is metal, but the inside of the spigot and the part touching the kombucha is PLASTIC. You don’t want plastic as the kombucha can leech out chemicals.
But, no worries, simply buy this stainless steel spigot replacement on amazon and replace the default one with it. Here’s a picture of the stainless steel spigot you need to replace the default plastic one with:
If you won’t buy the stainless steel spigot, then buy the NON spigot jar instead. Don’t bother buying the spigot jar without getting the replacement spigot.
Ceramic Vessels
Many modern brewers swear by glazed ceramic or stoneware pots. They’re durable and attractive, come in a range of sizes to suit any space, and because they’re opaque they provide the darkened environment that’s best for the SCOBY while it’s working away.
If you’re sharing a kitchen with someone who doesn’t like the space-alien look of a healthy SCOBY using a container like this may cut down on any arguments with your roommate(s)! Be sure that the container isn’t coated with a lead-based glaze. If the container is lined with enamel or porcelain, be sure to check that there are no chips or cracks in the lining. You may need to any discard ceramic or stoneware containers that have cracks in the glazing.
Personally, I prefer glass because I like checking on the status of the brew. But that’s just my own.
Best Ceramic Crock for Kombucha
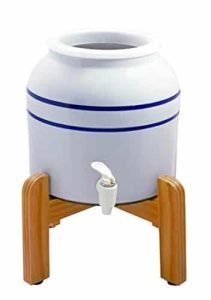
New Wave Enviro Porelain Dispenser with Wood Counter Stand
If you’ve got the horizontal space, this is my recommended container for ceramic. At about $38 USD and holding 2 gallons, it’s reasonably priced and it makes it easy to taste your brew. Unfortunately, the spigot is plastic and not stainless steel — not idea. However, many Kombucha brewing companies sell something similar as this but with a plastic spigot — so I suppose it’s ok to use.
Note, this costs under $40 and can be used as a small scale Continuous Brewing System or as Individual Brewing (up to you). There are similar setups with a 2.5 Gallon ceramic crock, spigot, wood stand some Kombucha companies are selling that are almost $159 USD! This is the SAME thing but 1/3 of the price!
New Wave Enviro Products Blue Striped Porcelain Water Dispenser (Single), 2.5-Gallon
If you don’t have the space for a wooden stand, you can go with the plain version. It’s about 10 bucks cheaper than the model above, but doesn’t have the wood stand. Personally, I recommend just getting the wood stand for 10 bucks more — it’s easier to siphon off the Kombucha when the container is sitting on the stand. However, if you don’t have the space or you want to individual brew instead of a setting up a continous brewing system, then this plain old 2.5 ceramic crock without the stand works fine. It also has the spigot as well.
Plastic Containers
You can also use food-grade plastic buckets to brew your “booch,” although you’ll be better off with glass for long-term storage.
Brands like Rubbermaid™ and Tupperware™ use food-grade plastic, but you’ll need to go to a restaurant supply store or brewing equipment outlet to get ones in larger sizes. If you’re not sure whether a container is made out of food-safe plastic suitable for brewing, check the bottom or side of the container for one of the two resin identification codes that indicate food safety: #1 PET/PETE and #2 HDPE/PE-HD.
This is your CHEAPEST option and well, plastic won’t shatter if you drop it, unlike the ceramic or glass options. Personally, I would avoid plastic. For normal liquid and food, food-grade should be ok. But for brewing, the Kombucha is acidic and may just leech some chemicals. Not work the risk to me, personally. I strongly advice you to seek out glass, ceramic, stainless steel, or wood before resorting to plastic. But if it’s all you have, then it will work.
Best Plastic Container for Kombucha Brewing
5 Gallon White Bucket & Lid Food Grade
This is my recommendation if you need a bucket. It’s 5 gallons, cost about $9 USD and is Food Grade, BPA free. Don’t just go out to your local hardware store and pick up a plastic bucket. It MUST BE FOOD GRADE. Regular buckets for construction and hardware purposes won’t be Food Grade. There is no way in hell you want to brew your Kombucha in one of those!
Metal Brewing Containers
Metal is another option. Many professional brewers opt for large metal containers because of their durability (try brewing with a 10 gallon glass jug and you risk breaking the whole thing with the wrong move). If you want a really BIG brewing setup, you need either wood (oak barrels), stainless steel, or perhaps special plastic vats.
Stainless steel containers work, as long as they’re good quality, and many people who brew beer or mead at home use stainless steel or even wooden barrels during fermentation. You can use the same type of high-quality stainless steel pot for brewing kombucha as you use for boiling water and making the sweetened tea. However, wooden containers are generally better for continuous brewing systems.
NOTE: Do not use cast iron or aluminum containers during primary fermentation, or at any point during the brewing and bottling process.
Best Stainless Steel Brewing Containers for Kombucha
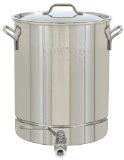
Bayou Classic 1064 Stainless 16-Gallon Stockpot with Spigot and Vented Lid
This container is a massive 16 Gallon stainless steel vat, suitable for a continuous brewing system. It’s not cheap at about $140 USD, but it’s huge, it’s stainless steel, it has a spigot and you can brew some serious ‘buuch’ with this baby. If you’ve got a ravenous family of Kombucha drinkers and you are tired of doing ‘one off’ brews in multiple containers, this is what you need.
Also not, this 16 gallon container is cheaper than any ‘Kombucha Continuous Brewing’ setup you will buy at kombucha stores online. Those give you a 2.5 gallon stainless steel crock for about $160 USD. With this Amazon offering, you get a 16 gallon one for $140 USD.
Tell me, what’s the better deal?
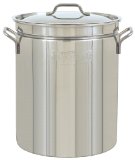
Bayou Classic 1036, 36-Qt. Stainless Fryer/Steamer ($55 USD on Amazon)
This is a cheaper alternative. It’s 9 Gallons with no spigot. If you want a large stainless steel brewing container that’s not ginormous, this should do it. At around 55 USD, it’s not a bad buy considering how big it is.
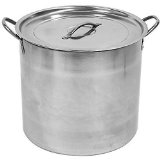
5 gallon Stainless Steel Pot with Lid ($31 USD on Amazon)
Finally, if you just want a smaller 5 gallon stainless steel brewing vessel, get this one. It’s only $31 USD and at 5 gallons should be more than enough to keep yourself or a small family with a ready supply of Kombucha between each 2 week brewing cycle.
Oak Barrels
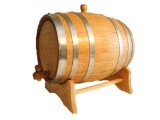
Ah, if you are SERIOUS about brewing and want the best of the best, well some say Oak Barrels are the way to go. We all know beer and wine brewers use these (as do some vinegar makers). Why not for Kombucha too? Some Kombucha brewer enthusiasts use these. And if you have the space, budget, and you seriously love your Kombucha, this is the best of the best.
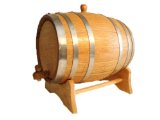
American Oak Barrel with Steel Hoops- 5 Liter or 1.32 Gallons
This is only about 1 gallon. If you are only doing small brews of 1 gallon (good enough for 1 person for 2 weeks, with 1 cup of Kombucha a day).Personally, if you love your booch and you can swing the $70 or so dollars for this 1 gallon mini barrel. Do it! Due to the size, this is best for one batch brews — it’s not big enough for a continuous brew setup. If you want 5x the size for less then double the price, and a more suitable container for a Continuous Brewing System, then look at the next option.
American Oak Barrel with Steel Hoops- 20 Liter or 5.28 Gallons
This 5 gallon brewing container will keep you in good supply of quality tasting Kombucha. Because of the design, it’s best used for a Continuous Brewing System over a single brew system. This premium brewing container will set you back about $132.
Glass Bottles & Bottling Equipment
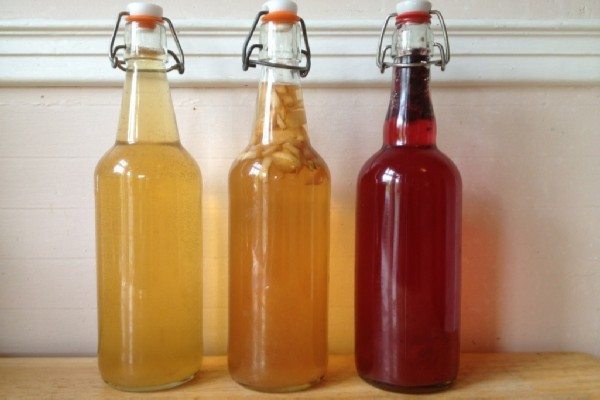
Many people who do basic small-batch kombucha brewing simply transfer the kombucha tea to bottles right away and put it in the refrigerator to store it until they’re ready to drink it. Refrigeration slows down the fermentation, and not much carbonation builds up, especially if the kombucha is consumed within a week or so. For short-term storage, you can use any type of clean recycled glass or food-safe plastic bottle that has a good plastic cap (don’t use metal caps).
However, if you plan to do a second fermentation, which will increase the carbonation in your kombucha, you’ll need to think about the types of bottles you use, and how they’re sealed.
Glass is the best thing to use for bottling kombucha for secondary fermentation, but you can also use plastic bottles, either new or recycled. If you’re reusing plastic bottles that once held water or soda, it’s a good idea to only use them three or four times before replacing them. The acids in the kombucha will degrade even food-safe plastic over time, especially if it’s the thinner plastic used for commercially-produced bottled water. The advantage of using recycled plastic containers is that they’re easy to find, and you can collect them from friends and family (as long as they don’t need the bottles for their own home-brewed kombucha!) which will help you keep your costs down if you’re brewing kombucha on a budget.
Secondary fermentation is an anaerobic process (the container must be sealed). To ensure a good level of carbonation and to reduce the risk of explosions or accidents, your best choice for bottling kombucha is a swing-top bottle.
Best Bottles for Kombucha
The swing-top style is also available for larger containers called growlers, which come in half-gallon (32 ounce) and gallon (64 ounce) sizes. There’s an even larger size of glass container called a carboy, for making five-gallon batches of kombucha in a single jar. These and other pieces of specialized kombucha brewing equipment are sold on line and in brewing supply stores.
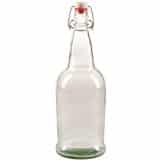
EZ Cap Bottles
The EZCap brand is a popular choice in the brewing community, and you can find 16-ounce bottles and bottle tops on line or in your local brewing supply shop.
Even if you are not a serious brewer, I highly recommend you buy a few sets of EZCap bottles to store your kombucha in the fridge or to do a second ferment in. Hands down, this takes your Kombucha from being merely good to absolutely fuzzily delicious. You can’t even compare how much better your Kombucha will taste after being second fermented for 2 or 3 days in one of these.
You have two size options here: 16 oz (2 cups) or 32 oz. (4 cups).
Personally, I prefer using the larger 32 oz bottles and doing a second ferment in each of them. 1 Gallon of Kombucha will roughly fill about 4 of them, so a pack of 12 should handle close to 3 Gallons of Kombucha. If you want the smaller size, get the 16 oz.
You can buy individual or by the case. I recommend by by the case of 12.
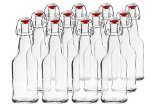
CASE OF 12 – 32 oz. EZ Cap Bottles
This is MY personal recommendation. 12 of these will handle about 3 gallons of Kombucha. They are big enough to do a good second ferment in each for a couple days while also still being sized for personal use. The latch top ensures you get a very strong fizz to your Kombucha.
In my opinion, these are not optional but essential to making good Kombucha. You can’t compare a second ferment done in one of these to a non-second ferment kombucha or a second ferment NOT done in a sealed bottle.
CASE OF 12 – 16 oz. EZ Cap Bottles
Same as above, except 16 oz (2 cups). I prefer having the 4 cup as it provides more flexibility for doing a second ferment, but you can certainly use these. One of these is enough for a nice cold kombucha drink.
Another option for secondary fermentation and long-term storage of kombucha is to reuse clean glass half-gallon or gallon jugs (like the ones apple cider is sold in) and seal the jug with a plastic-lined screw cap.
Auto Siphon for Bottling
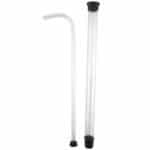
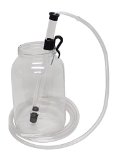
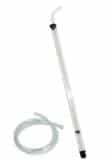
This is simply a special hose and giant syringe-pump-tool that lets you easily connect two containers and transfer the content from your fermented brew into bottles or another container without having to do a messy pour. Not necessary but a real time saver.
This is especially useful if you want to transfer your completed brew into smaller containers, especially EZ Cap bottles that are 16 or 32 oz, this makes the process a hell of a lot easier. You can get a bigger sized Auto Siphon or a smaller one.
Best Auto Siphon for Kombucha
Any siphon will work. If you have a bigger brewing container, you may want to look at a bigger Auto Siphon. If you have a smaller container and you are brewing 2-5 gallon batches, then you don’t need a big siphon.
Mini Auto Siphon WITH Tubing
This mini auto siphon can be used easily with 1 or 2 gallon jars or jugs. It’s not that big and it’s perfect for moving your brew from the first ferment into smaller bottles for a second ferment.
Auto-Siphon Mini with 6 Feet of Tubing and Clamp
This is similar to the one above, but comes with 6 feet of hose, meaning you don’t need to have your main container right next to your container. A bit more flexibility.
Large 1/2″ Auto Siphon With 8 Feet of Tubing
This is a larger siphon. If you have a 5 gallon or more brewing system, consider buying this one to save time.
Quality Control Equipment
If you leave them alone to do their thing, SCOBYs will process your sweetened black tea into tart-sweet kombucha tea all on their own, but there are things that you can do to make the process more efficient and more consistent.
pH Testing Equipment
As the SCOBY consumes the nutrients in the sweetened tea, it produces gluconic acid, lactic acid, and acetic acid, which all contribute to the many health benefits of kombucha. As the kombucha ferments during this process, the liquid goes from being sweet to being sour. The sourness of the tea is also called the “acid level,” something that can be monitored by testing the pH of the liquid. Properly-made kombucha will have a pH level of between 2.5 and 4.5. When the pH is higher than 4.5 the tea is not acid enough to prevent the growth of harmful bacteria. When it’s lower than 2.5, the tea will be too sour for most people to drink.
pH Test Strips
The cheapest way to test the pH of your kombucha is to use pH strips. If you had a chemistry class in school, you’ll probably remember using these. Your local pharmacy may carry them, or you can check brewing supply stores or online sources.
Best Ph Test Strips
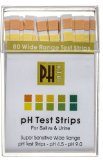
Phinex Diagnostic Ph Test Strips, 80ct -2 pack (160 strips)
For only $11 bucks, you get 160 pH testing strips. The cheapest method of doing a pH testing. Note that, for the average person, you don’t need to test for pH. Doing so just ensures you know EXACTLY how ‘done’ your brew is. It helps for consistency between batches.
pH Meter
Test strips generally only give you the whole number pH values (3, 4, 5, etc.), but that’s usually enough for most home brewers. However, if you want a more accurate reading, you can buy a pH meter to get precise results. This is a more expensive option, but with careful storage and use, you should be able to use the meter for many years.
Best pH Meter
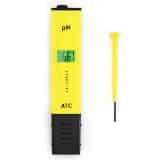
Etekcity High Accuracy Pocket Size Handheld pH Meter Pen Tester
This is a good one for Kombucha. It’s fairly cheap at around $20 USD.
Taste Testing Equipment
Another way to monitor the pH level is by simply tasting the liquid. While this won’t tell you the exact pH level of your brew, it’s the best way to tell when your kombucha is at the flavor stage you prefer. By tasting the fermenting kombucha daily, you’ll learn how long to brew kombucha to get the results you want.
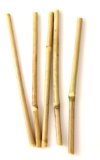
Bamboo Straw
To avoid disturbing the SCOBY, use a plastic or bamboo straw to get a sample of the liquid. Slip the straw carefully under the SCOBY at the edge of the jar until the straw is halfway immersed in the kombucha tea. Close off the top of the straw with a thumb or finger, and draw the straw back out.
Tropical Bamboo Reusable Drinking Straws, Set of 12
If you want to ‘taste test’ your Kombucha, these long bamboo straws will work. This is assuming you are brewing in a container that does not have a spigot attached to it. Using one of these straws makes it easy to sample the brew.
Glass Straw / Glass Thief Taker
You can also get a long glass straw that ‘sucks’ a sample of the liquid out and into the tube when you hold one end with your fingers. This is made from glass and won’t interact or disturb kombucha cultures.
Glass Sample Taker/Thief
This is made specifically for sampling Kombucha. A useful tool to have, though a bamboo straw or spoon works too.
Temperature Control
You’ll get the most consistent quality if you can keep your kombucha and SCOBY at a steady temperature of around 74F to 80F with the ideal being about 78F. If the temperature dips below 65F or so, the fermentation rate will slow down. If the temperature goes above 85F then the brew may ferment too quickly due to a high growth of yeast, instead of a balanced action by both yeast and bacteria. Although some people do have problems making kombucha in hot weather, most people are more concerned with keeping the SCOBY warm enough, especially if they live in areas with changing seasons. The winter and autumn months may have the temperature dip below 65F which means it’s much harder to ferment Kombucha at these times.
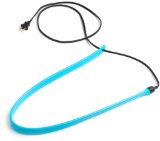
The good news for you is you can look at a heating accessory to ensure you Kombucha stays warm enough to ferment, ideally at the ideal temperature range. You can use a heating belt, which is the budget option or pay a bit more money for a full on wrap around heating pad, which provides more even heating.
Heating belt
The best way to keep your kombucha at a steady temperature in cooler climates on the cheap is to use a heating belt, or something else that wraps around the entire jar you’re using to ferment your kombucha. For the best results, you want to heat up the whole space and the whole amount of liquid equally. If you’re using a heating pad, place it around the jar rather than underneath. Look for a strip or pad that has adjustable settings or a timer switch, so that you don’t accidentally overheat your SCOBY.
Best Heating Belt
Brew Belt
This is a budget heating option. You just wrap it around your Kombucha bottle and plug it in. It will keep your Kombucha jar warm, even during the winter. If you want to brew in the cold, you need this. At $20 USD, it’s cheap too.
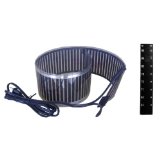
Heating Strips
Best Heating Strips for Kombucha Brewing
The Kombucha Mamma Essential HEATING STRIP ($55 USD on Amazon)
A cheaper version then the one below. Use this during the winter or colder months — it can bring up the temperature by about 5-10 degrees F — enough so you can adjust the temperature to keep in near the ideal range (74-80 degrees). It’s designed for warm to moderately cold. If you are in a very cold area with freezing temperatures, you may want to look at the model below which provides up to 20 degrees of warming.
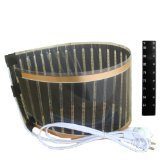
The Kombucha Mamma Year Round HEATING SYSTEM with DIMMER
If you can afford the $99 price tag, this is the best heating system for your brew, allowing brewing at ideal temperatures during the cold winter and summer. It’s big enough to wrap around a 2-5 gallon glass jar, ceramic container, or steel pot. It’s designed also to wrap around one of those Continuous Brew Containers, but it will work for any container that’s between 2-5 gallons. This model is more deluxe than the cheaper heading pad — it has a dimmer which allows you to modify the temperature so you can use it in winter, summer, sprint, and autumn. Basically, you can modulate the temperature to always keep it around the ideal brewing temperature.
Kombucha Brewing Accessories
There are a number of brewing accessories that, while not needed, make life that bit easier.
Cloth Jar Caps
These are basically pre-made fine-mesh cloth caps you can slip over the top of your brew for the first ferment. You can do the same thing with a cloth/paper tower + rubber band yourself, but these are convenient and cheap. We recommend a few of these.
Cloth Sleeves
These are simply fitted cloth material that you can slip around your Kombucha vessel to protect it from sunlight to ensure an even brew. You can do the same by using stoneware vessels that are opaque or moving your kombucha to a dark area with no sunlight, but cloth sleeves just mean you can put your kombucha anywhere — even in the direct sunlight — with having to worry about the sun affecting your brew.
Equipment for Continuous Brewing Systems
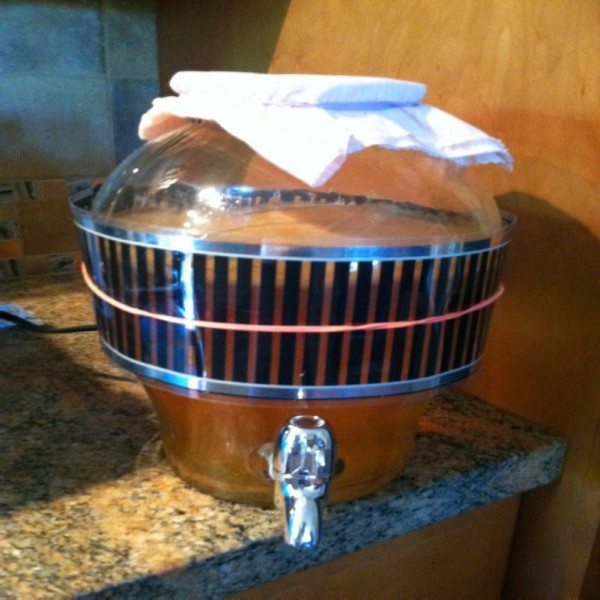
The main difference between single-batch brewing and a continuous brewing system for kombucha is that with a continuous brewing system you don’t remove the SCOBY after each batch. Instead, you simply continue to add new sweetened tea to the container in the same amount as you drain off the finished fermented kombucha. This means that you need a container that allows you to add liquid above the SCOBY and also remove the liquid from underneath the SCOBY. The easiest way to do this is to get a container that has a lid on the top and a spigot on the bottom.
Some of the containers we’ve mentioned are used as Continuous Brewing Systems. Typically, these containers are large — 2.5, 5 gallons, or 10 gallons, made from porcelain, stainless steel, or wood, and have a stainless steel spigot at the bottom. They often come with a plastic or wooden stand to sit upright on, so you can easily put a container under the spigot for easy pouring/sampling. You can often buy a whole ‘Continuous Brewing System’ package from one of the Kombucha supply retailers. These come with the Continuous Brewing Container, Kombucha Scobys + Starter, tea, and a few bottles — basically everything you need to get started. But you pay a premium usually.
A better DIY option is to just use Amazon.com and order all the parts separately– you can get a large container with a spigot and the other parts probably for 30 or 50 percent of what you’d pay for the whole package. Just a thought.
If you want to look at one of the complete setups, look at these links. Expect to pay anywhere between 200 to 400 USD for the whole ‘package’ though.

